Creative Jumpstart 2021

Creative Jumpstart 2021
Join me for the 10th Anniversary of CJS2021

Thursday, September 30

Projects from Claudine's workshop at Artascope

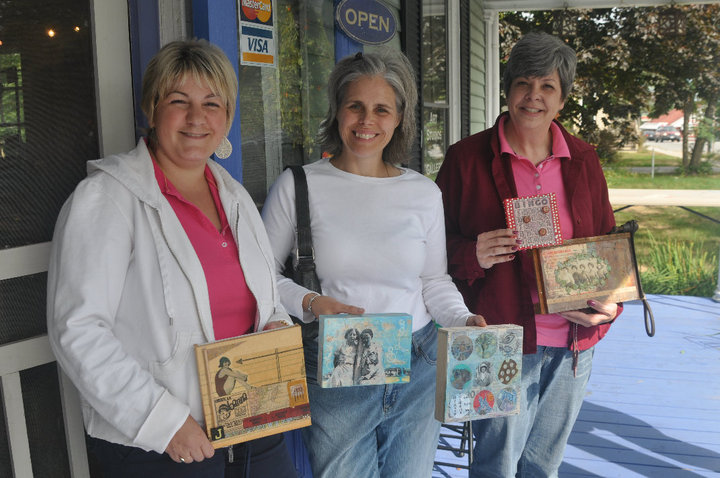
I'm finally getting around to posting my projects from the workshop I took at Artascope in Portland a couple of weekends ago. It was an amazing workshop - one that really kicked my creativity into high gear!!

It's always great to try new techniques and supplies - and this is one that I want to spend much more time with. I will say, this workshop just clicked with me. It just came so easily and naturally - that I wanted to go out and get a hundred canvases and start making beeswax collage pieces all the time. . . if only I had the time right now!

Anyway, here are 3 of the projects I worked on.....none of them are finished because I haven't had time - but close to being finished - and in plain sight so I don't forget about them!

This was my very first canvas - I worked on 8x8 wooden boards - with the exception of this one - it's 6x8. This one is really close to being finished....just a little something maybe a metal plaque or library label with some words....not sure.

Secone one, with some aha moments and solutions to problems I discovered in the first canvas. Still needs some green for the trees and the rising sun in the center. Yum. LOVE this one - I do think it's my favorite. I hope I can finish it so it looks like I imagine it to look!

This is my third canvas - called Living in Color. I like the concept - but the girls are a little dull and dark - I want them to be bright against the background not blend with it. I am thinking of taking a layer or two off and fix that about them.

That's all for today, must get to work....thanks for stopping by - enjoy your day!

Tuesday, September 28

Me n' Rosie

Thought I'd share some cute pictures I took of my friend Karen's dog sniffing me out. Isn't she a cutie!

The great pleasure of a dog is that you may make a fool of yourself with him and not only will he not scold you, but he will make a fool of himself too.

Samuel Butler, 1912

Friday, September 24

11 Years ago TODAY!

This little bundle of JOY came into our lives. He's silly and sweet, handsome and full of life - we love him more than anything!

Happy Birthday BUDDY!

As you can imagine, I'm up to my eyeballs in gift wrap, cake batter and frosting...enjoy your weekend - thanks for taking a minute to stop by!

Tuesday, September 21

Let there be LIGHT!

I wanted to start my post out today talking about light - and as an artist how important it is to have good light when photograhing projects, step-outs and just working in the studio on a day to day basis. I have struggled with good lighting since moving into this space in 2007.

This is what my studio looked like around 10 in the morning with no lights on. Dark. The light fixture I have on the studio casts an ok amount of light - but creates a LOT of shadows making the photography of step-outs REALLY frustrating. It didn't matter how I adjusted my lights - I got shadows - and had a yellow tinge on everything to the point that all the photos needed adjustment in Photoshop. In a word, FRUSTRATING!

After spending hours researching lighting, talking to people and looking at Home Depot, Lowe's and other places - I decided to try some photo studio lights made by Smith Vector that I got from Adorama, LOVE them. I got them about 3 days after I ordered them, and exactly as ordered. You should order from Adorama for your photography and lighting needs, they rock.

OH MY - insert Angels singing Alleluia! It was like working in the dark with my eyes closed to moving my studio outside to the middle of the lawn at noon on the brightest day of the summer. Here you can see a REALLY bright photo - right out of my POS camera. It's a little bright, but I kinda did that on purpose for the effect of it.

Here's my worktable, can you say WOW??

Pointing them up at the ceiling works best to brighten the entire room. If you look closely at this photo you can see a couple of works of art - one from my friend Nat at Scrapbook-Trends and a little art quilt from my friend Kelley.

There will be no SAD in this studio this winter, I guarentee it!

While I was away creating up a beeswax storm over the weekend - my husband was working up a shelving storm at home. He got my shelves installed - oh my heavens - things are finally coming together!! The light at the end of the tunnel is LITERALLY blinding me, LOL. I can't wait for the 15" of beadboard paneling that will go over the countertop and then a narrow shelf for jars of doodads on top of that. THANKS dude, you totally rock! LoVe you!

I thought I'd end this post with a couple of my favorite pictures from over the weekend at Artascope with Claudine, Karen, Kelley, Rosie and our new friend Danene. Rosie is the bulldog and Karen belongs to her, he he he. Really though, Rosie was the center of attention in our studio room on Sunday - lots of people dropped by to visit and say hello to Rosie...she got lots of tummy rubs and gave a few kisses here and there. Though, I think she was more interested in the treats that were downstairs.

This was on the ride Sunday morning, Rosie decided that I was snuggle worthy and rested her head on my shoulder from the backseat. She really is an adorable little dog!

Thanks for stopping by -- and I hope you have a beautiful, very creative day! If you want to make it really creative, hop on over to Today's Creative Blog for Get Your Craft on Tuesday...there's some pretty cool things going on over there!

Monday, September 20

Beeswax Collage at Artascope

All photos on this blogpost are from Catherine Bickford of Artascope Studios.

I took a break over the past weekend with a couple of friends to take a workshop from Claudine Helmuth at Artascope Studios in Portland. It was awesome. We had such a great time - and I really really love creating beeswax collages. Above is a picture of the whole group, including Claudine in the middle with the greenish apron. Below is our new friend Danene, in the middle is me and on the right my creating pal Karen.

Here's my first project, it just came together so easy and perfectly. LOVE the blue crayon on this. It just needs a frame of some sort. Any recommendations for a wooden canvas - that's 1 5/8" thick?

Below is my last project of the weekend - that I threw together - because I had an hour or so left. It's not done....but can you see the image transfer of the tree on the circle in the top row?? And the foil transfer eyeball on the fish in the very left of the middle row.....or the texture of the middle of a coffee cup czy in the circle on the center, far right?? You can do so many things with beeswax, you should try it if you ever get the chance. I do have a couple of fun things to add to this collage - dimensional things, but I need time.

Here's another photo of us before we left Sunday afternoon....can you see the creative juices flowing from everyone??

Thanks for stopping by, enjoy your weekend.

Saturday, September 18

beautiful Harvest

I took an afternoon away from working and picked all these (and more) and made a HUGE batch of tomato sauce with my Mother over the weekend. It is delicious and will be perfect on a cold, blustery night this winter!

I really didn't anticipate having so many tomatoes this year as my plants got some type of blight early on. I ended up ripping out my cherry tomato plants because they were ravaged and the fruit looked awful.

I had decided to leave the rest of the plants in the ground to harvest what I could - thinking it would be minimal. I was over-joyed with the amount that I ended up picking - and making things with. I've made salsa, stewed tomatoes and that huge yummy batch of tomato sauce. Plus we've eaten a ton.

The thankful receiver bears a plentiful harvest.
William Blake

I'd love to know, what did you harvest this summer? Enjoy your day and be thankful for the happy; unexpected surprises in your life!

Thursday, September 16

Still a Work in Progress

Wow, what a transformation....most of the mess has been organized and put away. Still waiting on those "details" to be installed....starting to loose my patience though.

You thought I was crazy on the last studio post about watching TV, but you can see there really is a TV in there now ;-)

Waiting on shelving to be installed so this will find a new home. urgh it's frustrating - everything I needed yesterday was at the bottom of the pile.

This is pretty much where I am today...still.

A view from the other side of the room.That's the kitchen through the doorway on the right and to the front door on the left. I think it's the perfect spot for a studio. My Dad made that shelving unit for me - but I need to take everything off it and put some supports under the center as it's starting to sag from the weight of all my stuff, I mean junk.

Hoping my shelves get installed today, when my installer gets rid of his headache. Thanks for stopping by, enjoy your day!

Wednesday, September 15

Quick Shots

My friend stopped by last week so I could take some new profile pictures of her....here's one of us at the fair last month, it came out cute.

I was surprised that it only took about 20 minutes to come up with these shots...she looks really cute.

This one is my favorite.

It was a nice break from all the organizing and work to do this! More studio tomorrow! Enjoy your day, thanks for stopping by.

Tuesday, September 14

More Studio....

I'm still waiting on a few "details" to be installed in my studio - like shelving, lighting, bead board paneling and other little things like that but here are some more pictures of the work in progress.

My installer guy working so hard he's in a blur. At this point, I was still a bit on the nervous side, it was a total MESS in there!!

He was done - but I didn't know where to start on the organizing part. Had to go to bed and sleep on it.

At least the mess was starting to disappear, LOL.

Once the big work table was taken out I started to see how things might come together.

I traded my big work table for this table....it's much smaller, allows me to sit down and my sewing machine has a permanent home, yay! And I can watch TV while I work, love that. I had a plan on organizing, purging and work spaces.....yes, think this is going to work for me.

Even the dog has a little spot to hide - and she's pretty happy there during the day when I'm working away.

Thanks for stopping by, more pictures of things as they are slowly coming together soon! Enjoy your day!

Sunday, September 12

A Break from organizing

I decided I needed to take a break from organizing and purging the other day to meet some friends for lunch at one of our local restaurants, the Frontier Cafe. The boy was home from school (really - go to school 2 days and have 4 days off ???? ) ---I also had a big box of goodies that I had purged that I wanted to give away.....

to this girl...

and to this one too...

Plus errands to run. Food to buy. Drawer knobs to pick out. Gas to get. This that and the other thing to do before the "boys" left for their long weekend of camping and I had the house to myself to get things organized and put back together.

But before I got home to that - I enjoyed the company of my boy and good friends and our fantastic lunches.

It was a lovely weekend. And I got a lot of stuff done. But I'll show you that tomorrow.

THANKS for stopping by.

Saturday, September 11

Studio Make Over

Ever since I watched Donna Downey's studio makoever unfold last year I dreamt of a re-organization like that. Every day that's all I could think of as I passed the doorway. It got to the point where I was creating in the living room or dining room - or NOT at all to avoid my studio.

A drawer for everything. A major purge of items never used or looked at. Clean and bright. Tools and supplies easy to find when I need them. Inspiration. Room for my favorite pieces of art. Room to breath and create and listen to music. That's what I wanted.

I had a notebook that I kept ideas in. I patiently saved and saved almost every check that came in the mail. I got rid of big pieces of furniture that I used to make do until I got room - to make room for what I dreamt of.

I planned and planned. And calculated how much money it would take.

And now, IT is finally here.

This is what it looked like before the cabinets were installed and everything organized. This is the clean corner.

This is where everything was shoved to make room for the new "furniture".

I'll show you what it looks like tomorrow. Thanks for stopping by!

Friday, September 10

Join me in my Fall Classes at My Creative Classroom

Check this out for an opportunity to win a ScHolaRSHip to one of my (or any of the) classes at My Creative Classroom.

Die Cutting with Spellbinders 101: We will start Die-Cutting with Spellbinders 101 with a tutorial on Spellbinders™ Dies. This lesson will include basic information on several different types of die cutting machines that you can use your Spellbinders™ Nestabilities® with. We will also discuss the different types of dies offered by the Spellbinders™ Company and dies manufactured by other companies that are similar to Spellbinders™.

We will end this lesson with a separate tutorial that combines different dies to create mats and incorporate them into a couple of basic cards.

Future lessons will instruct in embossing techniques and utilize those techniques on paper, fabric and metal. Students will also learn the ins and outs of using a magnetic mat with Spellbinders™ dies and other basic techniques.

Each lesson will offer a lesson demonstrating a new technique and a unique project that utilizes the technique.

This class starts on September 10, 2010 and is a 4 week class at My Creative Classroom.

Die Cutting with Spellbinders 201: We will start Die-Cutting with Spellbinders™ 201 with a tutorial on Spellbinders™ Dies for students needing a refresher course for working with Spellbinders™ dies. This lesson will include basic information on several different types of die cutting machines that you can use your Spellbinders™ Nestabilities® with. We will also discuss the different types of dies offered by the Spellbinders™ Company and dies manufactured by other companies that are similar to Spellbinders™.

Each lesson will offer a lesson demonstrating a new technique and a project that utilizes the technique.

Students will learn how to make partial cuts; double-embossing; cutting windows; the letterpress technique using Impressabilities dies; stenciling and making masks; and combining stamps with dies.

This class starts on October 8, 2010 and is a 4 week class My Creative Classroom.

Die Cutting with Spellbinders Projects: In this 4 week course we will use our Spellbinders™ Nestabilities dies to create beautiful holiday decorations, home décor items and other fun and creative projects that you can tailor to use a number of creative supplies you already have on hand!

Die Cutting with Spellbinders Projects starts on November 5, 2010 and is a 4 week class My Creative Classroom.

I hope to see you there!