Creative Jumpstart 2021

Creative Jumpstart 2021
Join me for the 10th Anniversary of CJS2021

Monday, November 28

Big Announcement -- CREATIVE JumpStart!


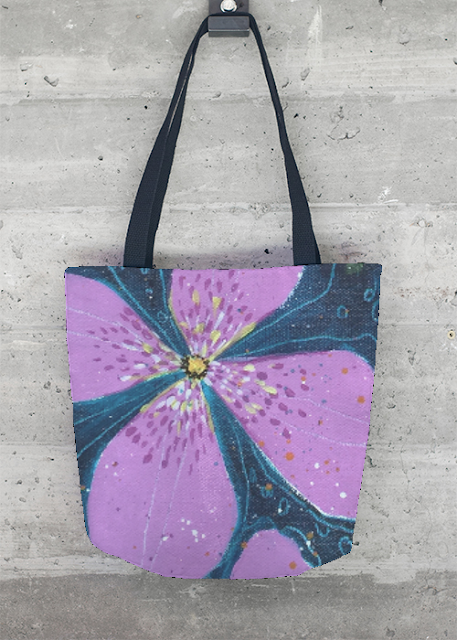
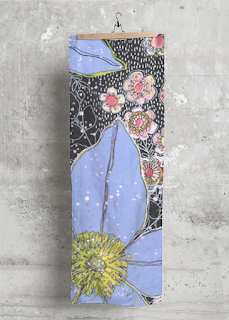
I'm excited to announce that I'll be participating as an artist in Creative JumpStart (CJS) 2017, run for the 6th time by Nathalie Kalbach. If you're not familiar with CJS, it's a one-of-a-kind online event to kick your creativity into high gear in January 2017 that I've been a part of since 2012. It's such a fun event, I really love looking back and feeling great about how far I've come as an artist. This year I can't wait to share my jump with you!

When you sign up for Creative Jumpstart you'll learn techniques, discover new materials, and connect with other artists and crafters -- and really JUMP START your creativity.

This is how it works, throughout January participants get access to 27 downloadable videos from 27 featured artists. I'm proud to be one of those artists, called “JumpStarters.” Each day is a new artist and new technique. Here's a little sneak peak so you can see for yourself:


Announcing Creative JumpStart 2017 - CJS17 from Nathalie Kalbach on Vimeo.


If you are interested, be sure to head on over to Nathalie's site to sign up and for more details:

http://nathaliesstudio.com/learn/online-workshops/creative-jumpstart-2017/?wpam_id=5

Here's how you can save! Sign up before November 30th (11:59pm EST) and you'll get all 27 videos for just $40 (USD).  Afterwards it will be 45USD until December 31st, 2016 before it goes to its normal sale price of 50USD.


So what are you waiting for? Sign up here at Creative Jumpstart 2017.

http://nathaliesstudio.com/learn/online-workshops/creative-jumpstart-2017/?wpam_id=5

Friday, November 4

Jillibean Soup + CardMaker Magazine Blog

Hello everyone, thank you so much for dropping by today for the Jillibean Soup + CardMaker Magazine blog hop. You're coming here from Sean Fetterman's fun blog.


Today I wanted to share with you how EASY the super sweet Mason Jar Shaker Cards are to use and show you how I created a super cute snowman jar.

To create this card, I stamped the snowmen using black Archival Ink. For the background, I stamped and embossed white snowflakes and then used Prussian and Blue watercolor paints to paint the background. then I added little bits of color here and there to my snowmen and women and I set it aside to dry.


To attach the clear jar to the snowmen stamped image, just pull the white paper off of the adhesive and press into place.


I stuck a few large snowflake sequins inside to give my shaker a little excitement. 


To finish up, I added a string around the edge of the jar. 


And a cute tag to the string. 


To finish I used a double stick adhesive to add it to the inside of my card, I also covered the back of the card with a pretty snowflake paper to hide the back of my messy painted paper -- and voila -- this super cute card is done!


Make sure you head on over to Jeanne Streiff's blog and see what creative genius she has whipped up for you today!

Here's the entire list of bloggers that playing along in the CardMaker blog post in case anyone gets lost.

CardMaker Blog: http://www.cardmakermagazine.com/blog/
Daniela Dobson: http://danieladobson.blogspot.com/
Kelly Gettelfinger: www.alwaysstampin.com
Sean Fetterman: www.fettermandesigns.blogspot.com
Catherine Scanlon: http://cmscanlon.blogspot.com/ ==> You're Here
Jeanne Streiff: www.inkypaws.blogs.splitcoaststampers.com
Juliana Michaels: http://www.17turtles.com/
Jillibean Soup Blog: http://www.jillibeansoup.typepad.com/

Also, make sure you stop by the Jillibean Soup blog -- I heard from a little birdie that they'll be hosting an amazing giveaway on their blog.

Here's the link for you: http://www.jillibeansoup.typepad.com/

THANKS for dropping by, have a wonderful day! 

Wednesday, October 19

THANK you Everyone!

Thank you to everyone that dropped by and left a sweet comment on my CardMaker Magazine post, I wish I could pick you all and send stamps to all of you lovelies! Don't worry though, I do have more stamps to give away - so stay tuned!


In the mean time, lets all congratulate Laura Holt on winning these three Leaf sets! Wohoo Laura -- I will email you at the address you listed!

Friday, October 14

Art Gone Wild Stamp GiveAway

Hello and HAPPY Friday! I can hardly believe that it's MID-October! Where has this year gone anyway?

Anyway, on to business this glorious day. I thought I say a big, heartfelt thank you to everyone for dropping by  -- especially the new visitors that are coming from the CardMaker Magazine blog post I shared and the fun animated GIF that shows the easy steps I followed to make the card I created in the sketch. 

As I mentioned, today I'm giving away the three Cling Stamp Sets from Art Gone Wild that I reference in my blog post, you can check them out here:  


I'll be picking a winner on Wednesday, October 19th so be sure to leave a comment and a way for me to reach you if you are chosen.

Thank you so much, have a wonderful weekend! 

Wednesday, October 12

Glue Dots + CardMaker Magazine Blog Hop

Hello everyone -- welcome to the Glue Dots and CardMaker Magazine Blog Hop. You hopped on over here from Kim Rippers blog. Today I wanted to share my new favorite product from Glue Dots -- the Glue Lines products -- but Glue Dots has been around for along time and they have a lot of really great products to choose from. 


I bet you're wondering what I really love about the Glue Lines...right? Well let me tell you -- these 1" lines of glue are perfect to permanently attach items to your paper projects and give them a little bit of dimension. They are pretty easy to use, just tear a piece of the cellophane strip they are packaged on and attach it to the item you want to attach to something else. The BEST part -- the cellophane stays on the Glue Line until you decide you're ready to attach it. This little feature allows you to prepare a large amount of items without having them stick together AND you can move it around on your project until you're sure where you want it to be.  


To make this card I used some Masking Fluid to mask the lines of the spider web and then painted Black and Indigo Acrylic Paint over the paper. Before it was dry I sprinkled some salt (my favorite technique) over the paint. 

When the paint was COMPLETELY dry I used an eraser to remove the masking fluid. For the sentiment, I stamped and embossed the word Boooo! using White Embossing Powder on Vellum and attached it to the bottom of the card. 

Then I used the Glue Lines to attach the Black Glitter Bats. Such an easy card, and the Glue Dots Glue Lines sure make attaching the bats super easy.


Make sure you visit the Glue Dots website to see their entire line of products as well as visit their blog today to see the AMAZING giveaway they are offering you!


Make sure you hop on over to the Glue Dots Blog because they are hosting a giveaway. Also,  be sure to check out the other amazing artists participating in the hop today! You're next stop on this blog hop is Melanie East, and I've included the entire list in case you forget where you are headed! 
THANK you for dropping by and THANK you Glue Dots for letting us try your amazing products! 

Saturday, October 1

Midnight Oasis

I've been a bit enamored with how my art translates to bags, tops and scarfs -- and I thought I'd share one of my recent favorites.


I created this canvas for work, and it's one I really love. I know this sounds cliche, but it kinda painted itself and I was only the guide for the brush. 

Just look how lovely it is on this sleeveless top!

http://shopvida.com/products/midnight-oasis-sleeveless

And this great tote bag!


http://shopvida.com/collections/catherine-scanlon/products/midnight-oasis-bag

Here's a little gift from me for you to use, it's good until October 10th!


Note: $20 Gift Card code can be used multiple times, but only once per transaction. $20 gift cards can not be used towards the purchase of gift boxes or cotton pocket squares. The code FavArtist20 can be used multiple times, but only once per transaction.

I hope you'll take a minute and check out my Vida shop, but in the meantime -- thank you so much for stopping by!

Friday, September 30

Bella BLVD and CardMaker Magazine Blog Hop

Hello and welcome to the Bella BLVD and CardMaker Magazine blog hop! I'm excited to share my project and quick little video using the AMAZING stash of Illustrated Faith products that Bella BLVD sent me! Also, make sure you hop on over to their blog because they will be hosting a pretty awesome giveaway over there.


I'm not much of the type of person that can write and draw in my Bible, it just doesn't feel right to me. I remember as a kid my Mom caught me with some crayons coloring in hers and she scolded me pretty bad. I guess that's probably why it makes me feel uncomfortable, like I am doing something wrong. If you're like me, you can still use the amazing Illustrated Faith products in a companion journal or even for your card making endeavors.

Today I wanted to share this colorful card I created with the Bella BLVD acrylic paints and the Friendship Die Cut shapes.


 Here's a quick video showing how I created the background. You'll need mixed media paper, water, a non-stick surface and kosher salt.


Once my papers were dry, I trimmed them to 4 3/4" x 6 3/4", rounded the corners and wrapped a piece of olive green ribbon around the center before I attached it to my card blank. Then I added the sprigs of leaves and the flower box -- which was on 1/8" thick foam tape.


The final step was to cut the sentiment from an old hymnal and glue it to the pretty flower square using a glue stick. If you were working in your companion journal you could easily create some found poetry to convey the parts of the Bible that you were thinking about.


You're next stop on the Bella BLVD and CardMaker Magazine Blog Hop is: Becki Adams

In case you got turned around, I thought I'd share the entire list of bloggers for the hop today:
CardMaker (http://www.cardmakermagazine.com/blog/)
Catherine Scanlon (http://cmscanlon.blogspot.com/) You are here!
Becki Adams (http://beckiadams.blogspot.com)
Daniela Dobson (http://danieladobson.blogspot.com/)
Jeanne Streiff (http://inkypaws.blogs.splitcoaststampers.com/)
Juliana Michaels (http://www.17turtles.com/)
Stephanie Buice (http://mybitsofsunshine.blogspot.com)
Kelly Gettelfinger (http://www.alwaysstampin.com/)
Nancy Damiano (http://thepaperorchard.blogspot.com/)
Laurie Schmidlin (http://www.justgivemestamps.typepad.com)
Sean Fetterman (http://fettermandesigns.blogspot.com/)
Bella Blvd (www.bellablvd.typepad.com)
Thank for joining me today, have a WONDERFUL weekend! 

Thursday, September 29

Vida Showcase

Today I wanted to share my Vida shop with you -- and also a $20. Gift Code when you order -- and I'm pretty sure you can use it on anything in the shop. The sleeveless tops and scarfs are so beautiful, especially these two!

http://shopvida.com/collections/catherine-scanlon/products/surround-yourself-top http://shopvida.com/collections/catherine-scanlon/products/uniquely-yours-scarf

I think the sleeveless top would be perfect with a super cozy sweater this winter. I can't wait for my scarfs to arrive -- the $20 coupon code expires tomorrow night -- so make sure you take advantage of the savings! 

http://shopvida.com/collections/catherine-scanlon


THANK you so much for dropping by, have a wonderful THURSDAY!

Friday, September 2

Beautiful Inspiration Piece

See the pretty inspiration that I used to create this black and white card on the CardMaker Magazine blog

http://www.cardmakermagazine.com/blog/?p=14146

Thanks for dropping by, have a wonderful weekend!


Thursday, September 1

Hello -- What's New?

I created a tutorial for this card over on the CardMaker Magazine blog, but made a little change to it that I thought I'd share. I didn't really like the background around the stamped design, so I added a little grey and light blue paint -- and I like it so much better now.

Here's what it looked like after I painted the background:


and what it looked like before:


PS. This is my Elegant Flower Frame from Art Gone Wild, you can find here!

Have a wonderful day, thanks for dropping by.

Friday, August 19

Quick + Easy Cards

I'm up again on the CardMaker Magazine blog sharing how I created this set of Quick + Easy cards.

http://www.cardmakermagazine.com/blog/?p=14062

Thanks for dropping by, have a WONDERFUL weekend!

Wednesday, August 17

CardMaker Magazine + Momenta Blog Hop

Hello there! Thanks for dropping by today -- you should have come to visit my blog from blog for the Momenta and CardMaker Magazine Blog hop. Make sure you take a few minutes to visit the Momenta Facebook page as they are hosting a pretty awesome giveaway!


Today our blog hop is all about the amazing mixed media products from Momenta and Art-C and I thought I'd share how easy you can create a beautiful mixed media card using their great range of products. (As this point, I should mention that I work for Momenta in their Portsmouth office.)

For this card a have a few different things to create before I can assemble the card, so let's start with the background paper. I used the Feather Stamp from the Stamp + Die set with VersaMark ink to stamp a pattern on smooth watercolor paper. Once the pattern was created I sprinkled clear embossing powder over the surface and heat set with a heat gun. When that was cool I used the Copper Metallic paint, watered down to add some color to the background. When that was dry I trimmed, rounded the corners and inked the edges.


White the paint was drying on my background sheet I stamped and painted the feather sheet. I wasn't sure just how many feathers I would want so I filled the page with the various feather stamps and added color with blue watercolor paint and some random Copper Metallic paint splatters. When that was dry, I trimmed a strip off the top to use as a ribbon and die-cut the feathers.


Here's a quick tip, use post-it notes to hold the dies in place while you create your cutting sandwiches and die-cut the shapes.


For this card I also used a piece of the Marble Paper from the Momenta paper pad and a piece of black shimmer card stock. Here's a quick shot of all the elements I have to create this easy, mixed media card.


Assembly is easy, layer the elements with a dry adhesive.


To finish, just add the feathers and a piece of twine and stamp a little sentiment to tie to the twine.


Thank you so much for joining me today, your next stop on this Cardmaker Magazine Blog hop is:


And, in case you aren't sure where you came from, or want to start over -- here's the line-up:

CardMaker
Jeanne Streiff
Juliana Michaels
Daniela Dobson
Sean Fetterman
Nancy Damiano
Catherine Scanlon < ---- You are here  
Kelly Gettelfinger

Oh, if this couldn't get ANY better -- Momenta is having an AMAZING Giveaway on their Facebook page. Good luck on the Giveaway - and thank you so much for dropping by today, have a wonderful weekend.

Friday, July 29

Celebrate + Decorate on the CardMaker Blog

One of the best things about my "day job" is I get to create fun projects like this. Hop on over to the CardMaker Magazine blog and see how I created custom paper to make these pretty party favors!

http://www.cardmakermagazine.com/blog/?p=13938

Thank for dropping by, have a wonderful day.

Wednesday, July 27

CardMaker Magazine + Plus America Blog Hop

(http://www.plus-america.com/)

Hello there! Thanks for dropping by today -- you should have come to visit my blog from Juliana Michael's blog for the Plus Corporation of America and CardMaker Magazine Blog hop. 

Make sure you take a few minutes to visit the PLUS Corp Facebook page as they are hosting a pretty awesome giveaway!

Today it's all about Deco Rollers -- and I'm going to share with you how EASY the Deco Stamp Rollers are to use and create with. 


I also want to show you how easy it is to get a straight line. I don't know if you are like me, but I'm not that great at free handing straight lines -- and rolling straight lines wasn't much better. To fix that, I positioned the edge of the stamp on the edge of a metal ruler taking care to hold the ruler in place to keep it from moving.


Once I had practiced enough I was ready to move on to creating my card.

I used some pretty basic supplies: VersaMark stamp ink, DecoArt Media Fluid Acrylic Paint, Glitter Embossing Powder and my Fancy Flower stamp from Art Gone Wild


I decided I wanted to create a custom colored paper ribbon for my card, so I painted white cardstock with the Fluid Acrylic and let it dry. Once it was dry, I used the ruler technique to roll the stamp across the paper then I trimmed it into strips and picked the one that looked the best for my card.


To create the card, I stamped my Fancy Flower on white cardstock with VersaMark Ink and sprinkled Gold Glitter Embossing powder over the surface. Once the pattern was heat set I used DecoArt Fluid Acrylic paints to add color to the design. I also painted a my cardstock with the same red fluid acrylic paint to create a mat that matched perfectly.


I also hand-lettered a little sentiment and diecut a little tag that would accomodate the ribbon -- and voila -- a super cute card with a custom paper ribbon. Super easy, and the paper ribbon using Plus America Deco Roller couldn't look any cuter!


THANK you so much for joining me today, you next stop on this CardMaker Magazine Blog hop is Jeanne Streiff.

Tuesday, February 23

Momenta and Art-C

I've been working for Momenta for the last few years, mostly part time -- 1 then 2 days a week. Now it's pretty regular, 3 days a week -- what a dream come true to be able to go to work and be creative.

Lately I've been working a lot more hours, and I really love working there. I do so much more than just create. I'm not sure exactly what my job title is, but I do a lot of different things each week. It never gets boring, that's for sure.

This is one of the projects I made using one of their new collage kits.


Life sure is sweet these days.

Saturday, February 20

Maine, it sure is Beautiful!

Lots going on over here in wintery New England -- so I thought I'd leave you with some beauty shots of my world.


Traveling to work in Portsmouth with my husband, thankful that he's a great driver.


The tree around the corner, love the moodiness of this. Even though it's a color photo it looks black and white because of the fog, snow and no leaves on the tree.


Early morning in Kittery.


Later afternoon in Kittery. Almost the same spot as the earlier photo, different angle and different time of the day. I love living surrounded by all this beauty.

Thanks for dropping by today, hope it's pretty in your neck of the woods.