Creative Jumpstart 2021

Creative Jumpstart 2021
Join me for the 10th Anniversary of CJS2021

Sunday, May 22

Gardening Season is HERE!

Now that spring is finally here (well -- I'm questioning that as it was 47 degrees this morning) and I've cleaned up a good part of my of my to-do list; I've been spending time doing things that I love -- like gardening, a little junking -- and a little cooking as well.

Yesterday after spending the better part of the day shoveling dirt and mulch, pulling weeds, raking and planting all the plants I bought at the Library Plant Sale I made a batch of granola. I don't usually share my recipes -- but thought you would enjoy it.

I try to feed my family with as many healthy foods as I can, but when a box of cereal is $5.25 I seriously question whether I should just pick up the sugary goodness that I know they will love. Then my brain kicks in and I decide to make my own granola, and you can too because it's easy peasy lemon squeezy.

Though it has about 350 calories per serving, its also only about $5.50 per batch, and each batch is more than double what you get in a box for $5.50 -- and it has NO high fructose corn syrup or preservatives!

Here's my recipe for Maple Craisin Flax Granola:

Pre-heat oven to 350 degrees. Mix together in a large bowl:

  • 1/2 cup unsweetened apple sauce - or home made like mine was
  • 1/2 cup brown sugar
  • 1/2 cup maply syrup
  • Mix in a smaller bowl:
  • 1/2 teaspoon sea salt
  • 3 tablespoons cinnamon
  • 1/2 cup pumpkin seeds
  • 1/2 cup sliced almonds
  • 1 cup pecans
  • 1 cup sunflower seeds
  • 1 cup shreded coconut
  • Add the above ingrediants to liquid mixture and mix together until everything is completely coated. Add 7 cups of old fashioned oatmeal and mix until the oatmeal is completely coated.

    Spread out the mixture on large jelly roll pan and put in the hot oven. If you have two pans split the mixture between the two pans and the cooking time should decrease! Set the timer for 15 minutes. When the timer goes off mix the ingrediants around on the pan -- moving the granola on the top to the bottom. Set the timer for 15 more minutes. Keep cooking and mixing until the granola is crunchy -- about an hour or so. My oven is a little off.

    Remove the granola and put it in a large clean bowl. Add to the cooked mixture 1 cup of craisins or raisins and 1/2 cup ground flax seeds and mix together completely. Let cool before storing in an air tight container. You want to make sure the granola is completely cool before storing! -- or pre-measure into 3/4 cup servings and store in small baggies for a quick and easy breakfast. That's it -- not only is it DELICIOUS but it's economical and your family will love it. For me -- I know what goes into the granola -- no TSP or other artificial ingrediants. I have a child with a lot of allergies and try to limit the amount of preservatives and chemicals he eats. TSP is often used in cereals as an emulsifier -- but it's also used as a cleaning agent. I found this paragraph about it:

    A nonsudsing powdered TSP compound formulated for heavy duty cleaning. Preferred by painting and cleaning professionals for removing heavy deposits of grime, smoke, soot, and chalked paint. Kills mildew when mixed with bleach.
    Do you really want to eat cereal with THAT in it?? ewww. Anyway, enjoy the recipe! Thanks for stopping by, now that my to-do list is pretty free I will be posting more creative projects! Enjoy your day.

    Saturday, May 7

    Happy Mother's Day

    I know, you've seen this card done a million times, but my Mother saw it in a card magazine and absolutely loved it -- so I had to make it for her.

    But, I had to make it and add my own spin to it. The templates I've seen around make a card with a flower pot that's about 4" tall and the overall card is pretty tiny. This card is too big to fit in the largest envelope I have -- it's at least 8" tall or taller ;-) I also embossed the body of the flower pot with a Cuttlebug Embossing folder, stitched up the sides, used pre-made flowers and the flower pot edge.

    I know that she'll love it -- no matter how many times it's been done! Anyway, for all my friends that are Mother's -- HAPPY Mother's Day! Thanks for stopping by, have a great day!

    Tuesday, May 3

    Keep your Face to the Sun

    Along time ago I was blog hopping and saw the most beautiful card -- and upon reading discovered that it was created by squashing pansies in a flower press (or something like that) on top of watercolor paper. Sadly -- I don't remember where I saw it or the name of the artist. Her card was beautiful though, and I think she had something to do with Stampin' Up.

    Anyway, since I don't have the patience to wait for a flower press to do the job, I ran this orange pansy through my big shot on top of a quote that I had created and printed on cardstock. The flower turned into a squishy mess, but once I had wiped away all the debris, I thought it looked amazing! I was surprised that the purple detail was in the center. I think I'll be stopping by the Greenhouse to pick up a flat of pansies when I get a minute or two to breath.

    Well, even though I've got twenty million things going on, I couldn't leave this beauty sitting on my desk. So I rifled through my scrap bin and came up with this quick card. It really only took me about 15 minutes -- though that's 15 minutes that could have been spent writing instructions, LOL -- or 15 minutes more sleep. Well, sleep is over rated anyway. I'll just stay up 15 minutes later than I planned.

    This was a fun creation, and exactly the creative respit I needed to be able to spend the rest of the night on the computer writing instructions!

    Thanks for stopping by, hope you are having a fabulous week so far!

    Wednesday, April 27

    Sneakie Peakie

    I've been busier than busy the last week or so -- but wanted to share a sneak peak of Lesson 1 from Spellbinders Card Workshop that I'm teaching at My Creative Classroom. It started on Friday but there's still time to register - but you might want to hurry because it's almost full. If you mss out, it'll be running again in the Fall Semester!

    Hope you have a great weekend, thanks for stopping by!

    Our trip to Acadia

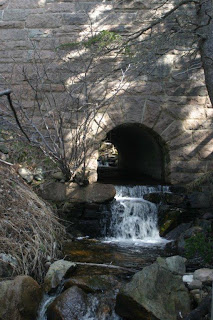
    Thought I would share a few pictures from our little trip to Acadia National Park last week. These pictures are straight out of my Canon 10D. No editing AT ALL! Love that.

    Doesn't the root coming down from the right look like a skeleton hand? Creepy.

    Playing with the depth of field on my camera. I always forget what settings to use until I start using them again.

    And on the way home, we HAD to stop at the Big Chicken Barn. It's literally in a HUGE chicken barn -- though this time they didn't have anything I couldn't live without!

    Thanks for stopping by, it's Wednesday - halfway to the weekend! Enjoy the rest of your week!

    Tuesday, April 26

    Cherry Blossom Birthday Card Tutorial

    What do you do when you are short on time, have forgotten you need a birthday card -- and can't get to the store to buy one...not to mention that buying cards makes you feel guilty because you have a studio FULL of supplies to make cards?? Well, you look through your supplies until you find something you LOVE (like the Cherry Blossom Vellum stickers shown here) and make a card. I will say I spent more time LOOKING at my supplies than making this card, LOL.

    Here's a side-ish view so you can see the dimension, LOVE dimension!

    And a close-up of the tag. Lately I've really been into making little tags for cards and things.

    If you want to make a card like this, or see how I did it, check out the detailed Tutorial over on the Spotted Canary blog that I write for.

    Sorry for long time with no posts. Last week was school vacation week and we took a little vacation up to Acadia National Park. It was a nice few days away without the computer, TV and lots of other things. I've got a busy few weeks but I hope to post more often!

    Thanks for stopping by, have a great day!

    Monday, April 18

    Literally, 10 minutes!!

    I needed a tag for a very special birthday gift today -- and literally had 10 minutes to spend making it. Between a few last minute things for a work project, finishing up SAID birthday present and spending time dilly-dallying over my morning tea that's all that was left.

    After a quick shuffling through a basket stuffed with tags - I grabbed a shipping tag that my dear friend Vic sent me eons ago. She sent me a bunch and I've been hoarding them. I think she made it with Glimmer Mist -- WAY before Glimmer Mist was cool. I also grabbed a fun birthday stamp set that I got when I went to visit the EK Success offices last fall, a black StazOn stamp pad and a blue Distress Ink and some Wax markers. Well, I shouldn't say I grabbed really -- everything except the tag and stamp set was scattered across my work table from other things I worked on over the weekend. I didn't even think about what I was going to do, I just grabbed - inked - and stamped and colored. And the best thing, it can be re-gifted -- or re-used because I didn't put her name on it!

    Really, that kraft gift bag needed dressing up -- I just couldn't give that special gift with no tag, ribbon or button. It looked awful and like something I brought home from the grocery store!

    Anyway, the tag (and the gifts) were a hit. I made a bird feeder from a tea cup (google diy tea cup bird feeder for instructions, that's what I did) and I also gave her one of the pretty wax collages I made a few weeks ago. Moral of the story -- choose to spend 10 minutes making something special instead of buying something premade and probably printed somewhere else! Crafting a gift for someone you know will appreciate it is so much better than a gift card or a gift from Macy's makes you feel so good.....not that shopping at Macy's doesn't make me feel good, LoL.

    Anyway, thanks for stopping by, hope you have a great rest of your day!

    Sunday, April 17

    Cleaning up the Desk

    I woke up this morning determined to use a small pile of scraps that had been left on my desk from several other projects I worked on this week. I find that I don't use as many of these "scraps" as I should, so I'm trying to do better.

    I'm pretty happy with this little tag, love the sequin butterflies, wish I could find the punchinella that made these, LOL. I'm also happy that I used up some of the scraps from the week!

    We had a great family night playing cards last night, but I lost most of my (I mean my husband's) money. Looking forward to a chance to win it back soon, though I may have to use my own cash next time.

    thanks for stopping by -- hope you have a great day. It's a torrential downpoor today so I think we are headed off to the flea market. I've got some projects in the works that I need a few things for.

    Saturday, April 16

    With -- or Without??

    Another card today -- woke up inspired to make a card for Easter -- and since the house was quiet I had the time to get it done! I'm not sure which version I like better, the one with the flower at the top or the one without?

    The one above -- or the one below? What do you think?

    I think the first one looks best.


    We're having a little get together tonight, family card night -- so I've got a few things to get done. Thanks for stopping by, hope you have a great weekend!

    Friday, April 15

    Have a GREAT day!

    Just a drive by post to share this birthday card I made for my brother this morning. His birthday was Tuesday -- but my Mom said he was on a business trip so hopefully the card will get there before he gets home.

    I've got a million things to do this afternoon! Hope you have a great day and a great weekend too, thanks for stopping by!

    Thursday, April 14

    Expressing your Creativity Using Paints

    I like stamping – and I like coloring too – and the combination of these two pastimes can result in something beautiful to keep, have or use! More than coloring, I like painting. Before I started scrapbooking and creating with paper I was a watercolor artist – I’ll be the first to tell you though – I never knew that painting a stamped image would be so satisfying to me!

    To read the rest of this article, and find out how you can win a $50. stamping prize package, go to the Expert Blog on the Spotted Canary for more info!

    Thanks for stopping by, hope you are having a great week! My finger is starting to heal, typing and crafting doesn't feel so bad today! I'm thankful it wasn't worse than it was! Ta Ta for now!

    Monday, April 11

    Big Weekend Plans

    I had big plans for this weekend. My guys went on a boys only fishing trip in upstate New York early early on Friday Morning and I had the weekend to myself. After a facial, some junk shopping and a movie on Friday and Saturday morning I settled in for some crafting projects and Red Box Movies. I wanted to make some stamped projects for my Expert Blog post, and I also wanted to make a card using this sweet stamp from Inkadinkado. I've had it for several weeks and couldn't stop thinking of what I want to do with it.

    It's a small stamp, you can see how small it looks on the card below -- the card measures 5" x 7".

    To make it, I stamped the little chick twice and I cut the second one out and put over the first one with a 3D Dot. After some stitching and painting I loved it. I made that card and another on Saturday night and started a few other projects on Sunday morning (which I can't show you just yet) before IT happened.

    Sunday, while working on another project that required the use of my sharpest scissors -- I had to stop make a quick trip to the ER to get my finger fixed up. I decided to get some professional help after 25 minutes and it was still bleeding pretty heavy. It was quite comical driving myself to to the ER -- shifting and steering with one hand and holding my bloody wrapped finger up in the air to help stop the bleeding. In the end, they couldn't do anything for me but get it to stop gushing and wrap it up. Because the tip was gone there was nothing much to stitch.

    It hurt quite a bit, and I bumped it a couple times today and it started bleeding each time. This isn't the best picture, but that's me with my huge wrapped finger in the ER. Well, that was about all I could handle for the weekend. I went home and put all the crafting things away and had a rest on the couch. I did manage to change the bandage to someting a little more reasonable this morning, so I think I'll live.

    That's all for my drama, thanks for stopping by, hope you had a safe weekend and stayed out of the ER!

    Note to self: when you think you need wire nippers -- get up off your lazy butt and get them instead of trying to make do with scissors.

    Friday, April 8

    Study of Rudbeckia

    I've been busy in the studio this week working on these projects and a few others. You know when you create a piece of art that makes you feel good, and the feeling lasts for days and days and inspires you to want to create more pieces of art?? That's what these two pieces did for me this week. I've been in a big rut lately -- well for a good long time really. More than just creativily - just in everything.


    This week, I feel like I'm on my way out of the rut. Really. It's amazing what a few warm, sunny days and some time to create some great art will do for the soul.

    If you are feeling down and out -- I highly recommend creating something. Whatever medium you like to work with - just go do it. Spend the afternoon at it. Spend a couple afternoons at it. I need to remember how great I'm feeling this week the next time something gets me down! You will feel so much better after!

    Thanks for stopping by -- hope you are having a great Friday - and have a great weekend too!

    Wednesday, March 30

    Happy Birthday

    Just a quick post to share a card and some sweeties I made for my Mother's birthday. Not that we need more chocolates so soon after Valentine's Day -- but both she and my Dad love these White Chocolate Coconut Lime truffles that I make...and I couldn't not MAKE her something.

    BTW: Don't you love this picture?? It was taken with my Hipstamatic App. I use IT more than I use my regular camera these days.

    Chocolates and a card, both hand made. I think she liked them more than the gift certificate for fancy schmancy walking shoes, not sure though. Plus, since she's going to do all that walking she can eat the chocolates, LOL. All natural -- no preservatives and no corn starch -- they are practically healthy. Yes, I keep telling myself that.

    Hope you are having a great spring so far! I hope to feel like doing more blogging soon...you know how it goes. Well anyway -- thanks for stopping by, see you next time!

    Wednesday, March 23

    Mixed Media Workshop Starts this FRIDAY!!

    Are you bored with your art supplies, want to stretch your creativity or just want to try new intermediate Mixed Media techniques?? Then Mixed Media Workshop with Catherine Scanlon is the course for you.

    In this 4 week workshop at My Creative Classroom we will go beyond the basics of Mixed Media and explore working with beeswax, create beautiful layered backgrounds using vintage ephemera, touch on the basics of Gel Medium transfers and so MUCH more. Students will complete 4 creative projects during the length of this course, one of which will be an assemblage piece. We'll also throw some hybrid techniques into the mix in this fun course!

    If you sign up for this class during March (there's still a few days left) you can qualify to earn a free seat in other fun classes at MCC. Read all about what we're doing for National Craft Month here!

    Thanks for stopping by, hope you're doing great!

    Sunday, March 20

    Happy Birthday you old Fossil!

    My guys went up north this weekend -- 6 hours away -- ice fishing and snowmobiling. It was a boys weekend, (though I could have gone if I'd really wanted to) and I had a weekend to myself. It was nice. I've been feeling a little under the weather lately (yes....still) and needing some time to myself.

    I really enjoyed the time by myself. Stayed up late. Slept in. Though the phone rang off the hook and that drove me nuts. I ate leftover buffalo meatloaf sandwiches 3 nights in a row, THANK God THAT'S gone, LOL. I did get a LOT (really a ton) of projects completed that are due this week -- and even managed to take the dog for a long walk and spend this afternoon at Borders looking at books and taking notes.

    One of the projects I had on my list was a birthday card. It started out as a "quick" card for my brother's birthday -- and turned into an afternoon long project because nothing seemed to work. In the end, I'm happy with it -- though I wonder if I had started over if I would like it more.

    I got a chuckle when I looked through my antique book of fossils and found this page header.....perfect for my older brother, LOL.

    I had to stamp two clocks - because I ripped the little knob off when I was cutting around the first one. I just stamped another, cut it out and added 3D Dots to the back and it was fine.

    I like the little tag. Sometimes it's the little details that make a project.

    I wish I could share the other projects with you, because they did come out really cool. I'll be sure to let you know where you can see them though, when they are finally available!

    Hope you had a nice weekend and got lots of things done too. I feel like I set myself up for a GREAT, stress-free week by getting lots of things on my to-do list crossed off! Now I just have to wait for approval...cross your fingers ;-)THANKS for stopping by!

    Wednesday, March 16

    It's a Girl!

    I think I'm safe to post this card here today -- I made it for a baby shower that I'm going to go to in a couple weeks. I don't think she knows I blog, so it should be ok. If not, Heather -- please look away ;-)

    I picked up a sweet background stamp at Joanns a few weeks ago -- on clearance for like $1.97 or some crazy small amount. I love it, it looks like vintage lace. One of my resolutions this year was -- if I buy it I have to use it....and not in like 5 years - I have to use it SOON after the purchase.

    So, since I have other projects and classes that needed to be worked on today - it was the perfect time to do something OTHER than what I am supposed to be doing -- all the things on my way LONG to-do list -- and use that pretty stamp!

    Here's how I made this card, in case you want to make one too:

    Note: I made the decorative panel before I attaching it to the cream blank card base so most of the stitching will be hidden in between the panel and the card blank.

    1. First I stamped the lace stamp on cream cardstock using ballerina pink ink and trimmed it down to remove the excess cardstock.
    2. Next I stamped flowers (Papertrey Ink) using white ink on kraft cardstock and trimmed it down. I attached the two stamped backgrounds together and matted them on a piece of patterned paper (VERY OLD Basic Grey I think.)
    3. Then I stamped the frame and "it's a girl" (Martha Stewart) sentiment using black StazOn Ink on cream cardstock and stamped the lace stamp with Versamark over the top and trimmed it out. I added a little pink ink to the edges.

    4. I used my Spellbinders die (from StampMart) to diecut the patterned paper for the background. To make a diecut that was not available in the set, I traced the metal die on another piece of patterned paper and cut it out with scissors and added them to my card. This gives me a mat with a 1/8" space instead of 1/4"
    5. The pink ribbon and cream twill is cut to the slightly wider than the width of the card and the ends wrapped around to the back, adhering them with double stick tape.
    6. For an additional spot of color, I die-cut a Spellbinders Labels 4 from pink cardstock and cut it in half, placing each half in the center of the Labels 1 die from StampMart.
    7. Now it's time to add some stitching, I used a basic straight stitch with my sewing machine and stitched around the edge of the card and the Labels 1 diecut.
    8. I made a double bow using vintage seam binding tape -- attaching it to the twill.

    To finish of the card:

    1. Attach the sentiment block to the card with 3D Dots (or Pop Dots) to give the card a little dimension.
    2. Punch some butterflies (EK Success) from cream cardstock, ink the edges and attach to the card panel. Use 3D dots to lift them off the card if you want.
    3. Attach the panel to a cream cardbase and stitch around just the the edges to secure it in place, pull the thread ends to the back and tie them off to secure.
    4. For an additional embellishment, I stamped "congratulations" on cream cardstock and die cut it using a tiny Spellbinders Label die, inked the edges and tied it around the bow with twine and a button to keep it secure and hide the knot.

    That's it. It didn't take that long once I got right down to it. You could make the same type of card - just change the sentiment or colors to make it fit what you need a card for.

    Thank for stopping by, have a great day!