I'm up again on the CardMaker Magazine blog sharing how I created this set of Quick + Easy cards.
Thanks for dropping by, have a WONDERFUL weekend!
Friday, August 19
Wednesday, August 17
CardMaker Magazine + Momenta Blog Hop
Hello there! Thanks for dropping by today -- you should have come to visit my blog from blog for the Momenta and CardMaker Magazine Blog hop. Make sure you take a few minutes to visit the Momenta Facebook page as they are hosting a pretty awesome giveaway!
Today our blog hop is all about the amazing mixed media products from Momenta and Art-C and I thought I'd share how easy you can create a beautiful mixed media card using their great range of products. (As this point, I should mention that I work for Momenta in their Portsmouth office.)
For this card a have a few different things to create before I can assemble the card, so let's start with the background paper. I used the Feather Stamp from the Stamp + Die set with VersaMark ink to stamp a pattern on smooth watercolor paper. Once the pattern was created I sprinkled clear embossing powder over the surface and heat set with a heat gun. When that was cool I used the Copper Metallic paint, watered down to add some color to the background. When that was dry I trimmed, rounded the corners and inked the edges.
White the paint was drying on my background sheet I stamped and painted the feather sheet. I wasn't sure just how many feathers I would want so I filled the page with the various feather stamps and added color with blue watercolor paint and some random Copper Metallic paint splatters. When that was dry, I trimmed a strip off the top to use as a ribbon and die-cut the feathers.
Here's a quick tip, use post-it notes to hold the dies in place while you create your cutting sandwiches and die-cut the shapes.
For this card I also used a piece of the Marble Paper from the Momenta paper pad and a piece of black shimmer card stock. Here's a quick shot of all the elements I have to create this easy, mixed media card.
Assembly is easy, layer the elements with a dry adhesive.
To finish, just add the feathers and a piece of twine and stamp a little sentiment to tie to the twine.
Thank you so much for joining me today, your next stop on this Cardmaker Magazine Blog hop is:
And, in case you aren't sure where you came from, or want to start over -- here's the line-up:
CardMaker
Jeanne Streiff
Juliana Michaels
Daniela Dobson
Sean Fetterman
Nancy Damiano
Catherine Scanlon < ---- You are here
Kelly Gettelfinger
Oh, if this couldn't get ANY better -- Momenta is having an AMAZING Giveaway on their Facebook page. Good luck on the Giveaway - and thank you so much for dropping by today, have a wonderful weekend.
Today our blog hop is all about the amazing mixed media products from Momenta and Art-C and I thought I'd share how easy you can create a beautiful mixed media card using their great range of products. (As this point, I should mention that I work for Momenta in their Portsmouth office.)
For this card a have a few different things to create before I can assemble the card, so let's start with the background paper. I used the Feather Stamp from the Stamp + Die set with VersaMark ink to stamp a pattern on smooth watercolor paper. Once the pattern was created I sprinkled clear embossing powder over the surface and heat set with a heat gun. When that was cool I used the Copper Metallic paint, watered down to add some color to the background. When that was dry I trimmed, rounded the corners and inked the edges.
White the paint was drying on my background sheet I stamped and painted the feather sheet. I wasn't sure just how many feathers I would want so I filled the page with the various feather stamps and added color with blue watercolor paint and some random Copper Metallic paint splatters. When that was dry, I trimmed a strip off the top to use as a ribbon and die-cut the feathers.
Here's a quick tip, use post-it notes to hold the dies in place while you create your cutting sandwiches and die-cut the shapes.
For this card I also used a piece of the Marble Paper from the Momenta paper pad and a piece of black shimmer card stock. Here's a quick shot of all the elements I have to create this easy, mixed media card.
Assembly is easy, layer the elements with a dry adhesive.
To finish, just add the feathers and a piece of twine and stamp a little sentiment to tie to the twine.
Thank you so much for joining me today, your next stop on this Cardmaker Magazine Blog hop is:
And, in case you aren't sure where you came from, or want to start over -- here's the line-up:
CardMaker
Jeanne Streiff
Juliana Michaels
Daniela Dobson
Sean Fetterman
Nancy Damiano
Catherine Scanlon < ---- You are here
Kelly Gettelfinger
Oh, if this couldn't get ANY better -- Momenta is having an AMAZING Giveaway on their Facebook page. Good luck on the Giveaway - and thank you so much for dropping by today, have a wonderful weekend.
Friday, July 29
Celebrate + Decorate on the CardMaker Blog
One of the best things about my "day job" is I get to create fun projects like this. Hop on over to the CardMaker Magazine blog and see how I created custom paper to make these pretty party favors!
Thank for dropping by, have a wonderful day.
Wednesday, July 27
CardMaker Magazine + Plus America Blog Hop
Hello there! Thanks for dropping by today -- you should have come to visit my blog from Juliana Michael's blog for the Plus Corporation of America and CardMaker Magazine Blog hop.
Make sure you take a few minutes to visit the PLUS Corp Facebook page as they are hosting a pretty awesome giveaway!
Today it's all about Deco Rollers -- and I'm going to share with you how EASY the Deco Stamp Rollers are to use and create with.
I also want to show you how easy it is to get a straight line. I don't know if you are like me, but I'm not that great at free handing straight lines -- and rolling straight lines wasn't much better. To fix that, I positioned the edge of the stamp on the edge of a metal ruler taking care to hold the ruler in place to keep it from moving.
Once I had practiced enough I was ready to move on to creating my card.
I used some pretty basic supplies: VersaMark stamp ink, DecoArt Media Fluid Acrylic Paint, Glitter Embossing Powder and my Fancy Flower stamp from Art Gone Wild.
I decided I wanted to create a custom colored paper ribbon for my card, so I painted white cardstock with the Fluid Acrylic and let it dry. Once it was dry, I used the ruler technique to roll the stamp across the paper then I trimmed it into strips and picked the one that looked the best for my card.
To create the card, I stamped my Fancy Flower on white cardstock with VersaMark Ink and sprinkled Gold Glitter Embossing powder over the surface. Once the pattern was heat set I used DecoArt Fluid Acrylic paints to add color to the design. I also painted a my cardstock with the same red fluid acrylic paint to create a mat that matched perfectly.
I also hand-lettered a little sentiment and diecut a little tag that would accomodate the ribbon -- and voila -- a super cute card with a custom paper ribbon. Super easy, and the paper ribbon using Plus America Deco Roller couldn't look any cuter!
THANK you so much for joining me today, you next stop on this CardMaker Magazine Blog hop is Jeanne Streiff.
Tuesday, February 23
Momenta and Art-C
I've been working for Momenta for the last few years, mostly part time -- 1 then 2 days a week. Now it's pretty regular, 3 days a week -- what a dream come true to be able to go to work and be creative.
Lately I've been working a lot more hours, and I really love working there. I do so much more than just create. I'm not sure exactly what my job title is, but I do a lot of different things each week. It never gets boring, that's for sure.
This is one of the projects I made using one of their new collage kits.
Lately I've been working a lot more hours, and I really love working there. I do so much more than just create. I'm not sure exactly what my job title is, but I do a lot of different things each week. It never gets boring, that's for sure.
This is one of the projects I made using one of their new collage kits.
Saturday, February 20
Maine, it sure is Beautiful!
Lots going on over here in wintery New England -- so I thought I'd leave you with some beauty shots of my world.


Traveling to work in Portsmouth with my husband, thankful that he's a great driver.
The tree around the corner, love the moodiness of this. Even though it's a color photo it looks black and white because of the fog, snow and no leaves on the tree.
Early morning in Kittery.
Later afternoon in Kittery. Almost the same spot as the earlier photo, different angle and different time of the day. I love living surrounded by all this beauty.
Thanks for dropping by today, hope it's pretty in your neck of the woods.
Wednesday, February 17
Winged Things
This sweet little beetle is from one of my new stamp sets from Art Gone Wild, it's so cute and comes with a quote that says be beautiful on the inside. I also love combining it with hand lettering -- and since I love Rumi quotes this one seems to fit too.
Sunday, February 14
Friday, February 12
Wednesday, February 10
Diners, Drive-Ins and Dives
As a family we love watching Diner's, Drive In's and Dives. I'm not really a fan of the host, but I do love seeing the places they visit across the country. While I was in California last month I found that a few of my friends also love that show. So we found a Dive that was in walking distance of our hotel.
Tuesday, February 9
Sunday, February 7
the Be Series #2
The Be Series are simple little inspirational bits of advice that have the word Be in them. Anywhere. Beginning. Middle. End. Sometimes real quotes from famous people but most likely silly little quips that just jump inside my head.
Friday, February 5
the Be Series #1
When I went to the Craft + Hobby Association meeting I picked up this little Strathmore Journal at a dinner and couldn't wait to fill it with quick little sketches.
As I waited for my shuttle to head back to Maine I started filling the pages, they were 4" x 6" so they were fast little drawings.
And the Be Series was born.
Wednesday, February 3
Monday, February 1
Give those Rejects Time
Back in December I was working on my Creative Jumpstart video -- had limited time -- and was sick. Like super sick with a stomach ailment. I was tired. Stressed. Uninspired. Rushed.
You name it. This was one of my rejects.
Today I like it. Well, this part of it anyway. I cut the really ugly other part off and burned it.
What's the moral of the story? If you create something that you don't really like, just walk away for a while and when you come back you might feel differently about it -- or parts of it.
Thanks for dropping by today, have a great day!
What's the moral of the story? If you create something that you don't really like, just walk away for a while and when you come back you might feel differently about it -- or parts of it.
Thanks for dropping by today, have a great day!
Saturday, January 30
Friday, January 29
My Project for 2016
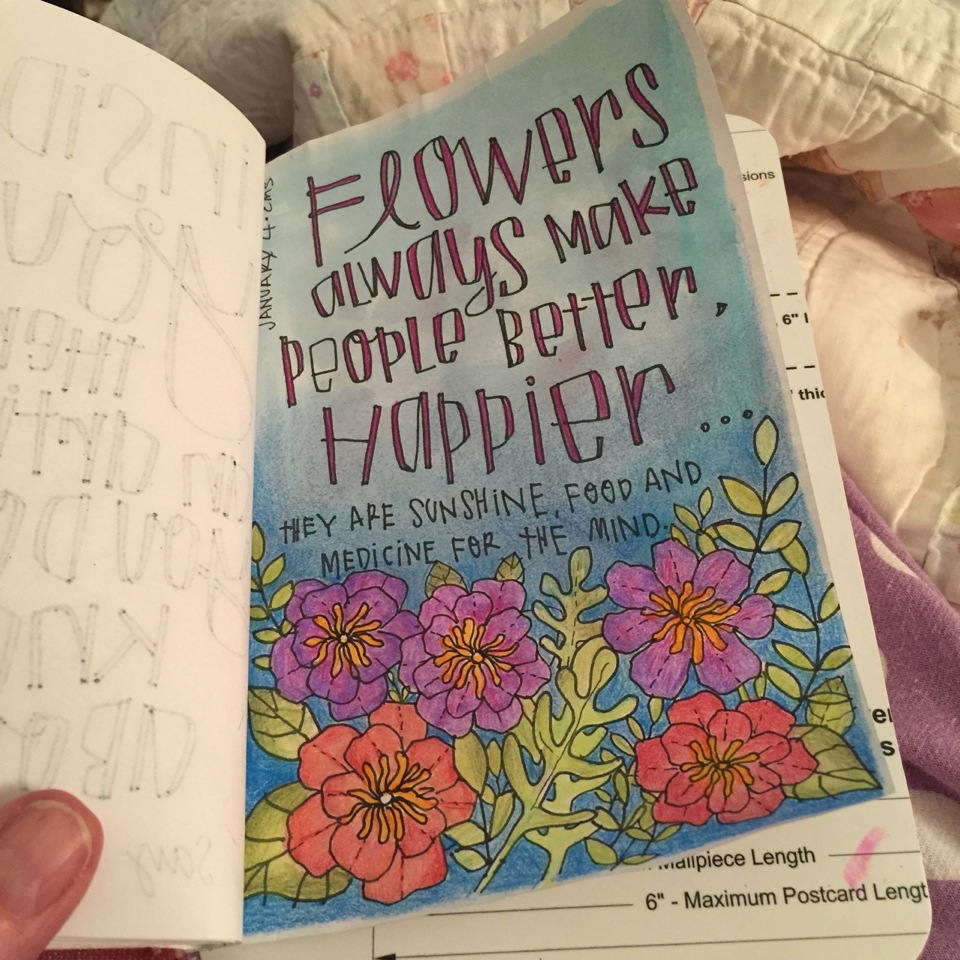
I'm working on a new book for 2016. Not sure that I will fill all the pages in a year, but I'm gonna work as often as I can to to add art and words to this lovely blank book.

I will probably even add some stamped pages.
Because, why not.

Oh wait, I already did.
I love my new Strawberry stamp from Art Gone Wild.
I also plan to add lots of sketches and qoutes that I love.
Maybe some color, but maybe not.
I also plan on dreaming big this year.
Because, why not.
P.S. I love my new beetle stamp. And honestly, I didn't even see the heart on his back until I started coloring this one in.
Big things -- yup they do start small.
And, they often start with cupcakes.
And sweet strawberries.
So why not.
What's your project for this year? Thanks for dropping by, have a wonderful day!
Subscribe to:
Posts (Atom)