Creative Jumpstart 2021

Creative Jumpstart 2021
Join me for the 10th Anniversary of CJS2021

Friday, February 27

Art Gone Wild 2015 Winter Stamp Release

I'm so excited, I got a shipment of my stamps from Art Gone Wild last week to use for the weekend classes -- I'm so excited about them. I think this is the best line so far. It's always a surprise, even though I created the art and worked to turn each image into a stamp to see it come through and packaged so nicely. I still pinch myself every once in a while to see if I'm dreaming!

http://agwstamps.com/catalogs/early_2015_catalogs/Catherine_Scanlon_early_2015.pdf

Look at these lovelies!! I used them over the weekend at a workshop in Abington, Massachusetts and the art that was created was so amazing -- I'll share some of those images next week!


And, here's a sample art journal page I created after being inspired by a student at the workshop.I used Tombow Dual Tip Brush markers for all the coloring on it.


And who wouldn't love to have a custom, self inked stamp??
Thanks for dropping by, have a great weekend!

Monday, February 23

Find a Place....

Good Morning. Today I thought I'd share how I start an art journal page using my new Stamps from Art Gone Wild and color the design with DecoArt Media Fluid Acrylics.

I start with stamping a design on Strathmore Mixed Media Paper. I prefer the 140lb weight as it doesn't buckle and is pretty sturdy. Once I'm happy with the design, I find a quote I like and use a pencil to add it to the page. 


For this page I started with the background, which is where I usually start most projects I create. I was really in love with the Cerulean Blue, so started with that color. It's good to put a drop or two of the paint on a non-porous paint palette as you work so you don't have to worry about the washes soaking into the paper. You can use a piece of plexiglass, palette paper or even a clean meat tray. 

I just dip the paintbrush in clean water and swirl it around on the palette paper until it's the consistency that I want and add it to the background. I do like to paint pretty quickly to prevent hard edges.


I keep working from color to color around the page until the entire image is done. What I like about the DecoArt Media Fluid Acrylics is you only need a drop or two, and it's easy to squirt out just the right amount.


You can even add enough water and use them with a dip pen for lettering and fine details. 


Thanks for dropping by today, I hope you'll give the Deco Art Fluid Acrylics a try, I think you'll be super happy you did!

Friday, February 20

Winter.....Winter.....Please Go Away!

To say we've had a lot of snow this year so far is an understatement. I'm crossing my fingers that we have a gentle spring!


Have a great day, I think we're getting another storm this weekend!

Wednesday, February 18

Creating Art with Kids + DecoArt

I'm so excited to share this fun kid safe project using DecoArt Media Misters from February Break Art Camp at Merrymeeting Art House this week. This is a fun and easy project that you can do at home with your kids.

We started with a block of wood that was approximately 4" x 6". You can have your local Home Depot cut the blocks from an 8 foot 2 x 6 to size right at the store, so don't worry if you don't have a saw to cut the wood to size at home. You could also use chipboard, canvas panels or any flat surface you have on hand. Recycling something would be a good lesson you could add to this project.

Before camp, I primed the blocks with Americana Sea Aqua Premium Matte Acrylic on all sides and let them dry completely. I also added a hanger from a recycled soda can tab on the back of each block so they would be ready to hang when my campers got their initial blocks home.


The first step was to have them choose 3 or 4 different paint colors and paint random designs on the front of the block using a fine tip brush. I showed them a few different patterns and then set them free to create.


Note: Before they got started painting random patterns, I had them trace the block on a piece of printer paper and draw the letter that was going to be on the block. As they were painting I asked them to name a few other words that started with their letter and went around the room cutting out the letters. It was fun to hear the answers.


Here comes the fun part. Because the DecoArt Media Misters are pretty much odor free, I could spray the blocks inside the studio without any adverse affects. Each girl brought her block and letter up to my desk and watched as I spritzed the black mister over their block.


It truly was magic watching their expressions when the mask was removed and the beautiful letter was revealed.


Look at the gorgeous blocks they created!


It's so wonderful watching kids create. They don't have any of the misconceived perceptions about being a good or bad artist at this age. The creativity that they have is simply amazing. I wish that all my students created with such confidence and abandon. 

Thanks for dropping by, have a lovely day! 

Friday, February 13

Tea Towel Love

I have been wanting to do something for a long time. But the first time I tried I couldn't figure it out. So I didn't finish the project and abandoned it. But I've been thinking about it and thinking about it and thinking about it.

For 2 years I've been thinking about having my own fabric printed.

Until recently. When I decided, I can do it. I researched the steps. I googled how to do it. And I did. I decided that what I was trying to do the last time just needed a little refinement.

This time I simplified my design, came up with a new approach and just did it. And I must tell you that I am so in love with the results. Here's the fabric panel that came in the mail from Spoonflower, and I made it available for you to order, if you want to. 

http://www.spoonflower.com/profiles/catherinescanlon

I hired my lovely Mom, well she's really my go-to seamstress -- to hem the towels after I had washed and ironed the panel.

http://www.spoonflower.com/profiles/catherinescanlon

Here it is, the completed towel. At home on my stove. And by GOSH I'm going to use it. I love it, I made it and it makes me happy!

Thanks for dropping by today, have a wonderful day!

Thursday, February 12

Toast

My friend recently opened a bakery in town.

https://www.facebook.com/bunbunsbakeshop


https://www.facebook.com/bunbunsbakeshop

From someone that doesn't eat toast or much bread, I think it's going to be a bad thing for the size of my hips. Her bread and pastries are the most delicious I have had in a very long time.


Tuesday, February 10

Card Sets, Oh My!

I've been waiting and waiting and waiting for these cards to arrive. The first batch got lost in the mail. Actually the mailman delivered them to the wrong address.

https://www.etsy.com/shop/CatherineScanlon

I'm so in love with the color and how well it translated from my scanned images to these cards. And the matteness (is that even a word??) and quality of the card stock, in combination with the color -- is just over all lovely. The size is a little wonky and not what I expected -- but everything else is wonderful. 

https://www.etsy.com/shop/CatherineScanlon

So wonderful that I've created a variety of card sets to make available to you in my Etsy shop. And because I'm so over the board excited about them, I am offering FREE Shipping! I think you are going to love them as much as I do! Some sets have 5 cards and 5 envelopes and some have 4 cards and 4 envelopes, so make sure you check to make sure you are getting the right amount.

Take a minute and check them out (and my stamps too) in my Etsy shop.  If you have any questions, make sure you message me! Thanks for dropping by today, have a wonderful day!

Monday, February 9

My Favorite Slaw Recipe

Today I thought I'd share my favorite slaw recipe. This is something that I just started throwing together a few years ago, not from a cookbook -- but me using my creative cooking juices.


This is the easiest and most delicious cole slaw you've ever eaten... 
  1. Cut 1 apple (like a Macintosh or Pink Lady) into small pieces
  2. In a bowl, mix together the apple, 1/4 cup sunflower seeds -- or just large handful, 2 tablespoons sugar, 2 tablespoons apple cider vinegar
  3. Add 1 package of shredded broccoli slaw and mix together
  4. Add 1/4 - to 1/2 cup mayonnaise and stir to coat everything with the mayo. 
 Let sit to allow the flavors to mix and enjoy! Yum!!

Have a great day and thank you for dropping by!

Saturday, February 7

From this to That!

I've had quite a few requests to share my process for creating pages in my Positivity Journal, so here goes. Not a step by step -- I'll get to that, but this is a great start. These two stamp sets happen to be from my Late, 2014 Stamp Release with Art Gone Wild.  I'm anxiously awaiting samples from the latest release to create samples and new pages with.


I start by stamping an image using archival or any permanent black ink on my journal page. Then I look to the internet to find a quote to fill the space and add it with a pencil. I usually search google, things like "friendship quote" or whatever feeling or thought I want to add for a quote.

Color is added using various mediums (watercolor paint, markers, colored pencils, gelly pens.....to name a few.) and then the quote is inked and shadowed and further details might be added with a white or gold pen and voila, done!

Easy peasy lemon squeezy! As soon as I have new samples I'll create a fun little video showing some of my secrets!

Thanks for dropping by, have a wonderful day!

Friday, February 6

My Artful Life Planner - Catch Up

My sweet friend Tina Walker (A Dog's Life) bought one of my "My Artful Life Planner's" from my on-line classroom and decided to make it a year long sharing project. Each month she's going to share her progress and inspiration for coloring and working on the pages of her planner. (I have one completed planner in my Etsy shop, or you can buy a a download and print it yourself.)

I decided that it was a great idea and Tina graciously welcomed me to play along with her project. So, since she's already posted about it (read her blog post here) I'm kind of playing catch up, but here you go!

My intro page -- where I'm sharing my #OLW of positivity.


Here are the pages at the beginning of the planner that have facing blank pages for notes, doodles and organization. I decided not to share my blank pages here.


And my January spread, so you can see how I fill the spaces with doodles, notes etc.


This is a tip in page that I included. It was the sample from last week's Art Journal Toolbox class at the studio.

And the last page.


I use a variety of mediums to color in my designs. Colored pencils, Tombow Dual Tip Brush Pens, Sakura Gelly Roll pens, and watercolor paints. The result are lovely mixed media pages that have given me something to do while waiting at appointments, practices and in the evening when I don't want to start a new project. 

Thanks for dropping by, check out Tina's blog post for this month here, and next month we may have another person (the lovely Martha Richardson) playing along. We'd love it if you shared your pages too!

Have a wonderful weekend! 

Wednesday, February 4

Important to Play

Last year I made a promise to myself that I would create something in my journal everyday, and I did. But I'm out of the habit I think. I'm spending plenty of time working in #myartfullifeplanner but I still crave the outlet of drawing and painting in my 9x12 journal.


So, in an effort to keep myself accountable, I thought I'd share a couple of pages that I have managed to buckle down and create in January.  And great news, I'm almost done with the first for February.

I like them, and they are a great reminder to me to keep on keeping on.

Thanks for dropping by, have a great day!

Monday, February 2

The Art Chain

I had two friends tag me last week for the #artchain and today I thought I'd share the art I shared and why I wanted my friends to know the story behind each piece.


Day 1.  I am inspired by both of these ladies in so many ways -- Martha for her sense of color and free style and Jennie with her lovely attention to detail and sweet vintage style.
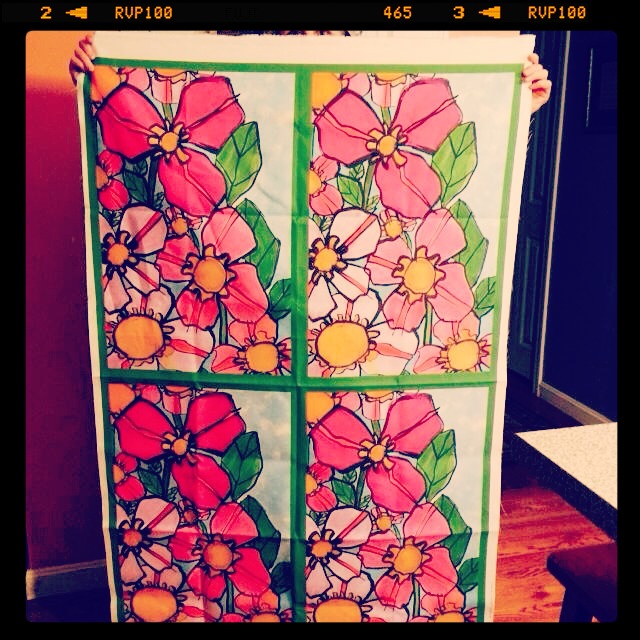
Choosing favorite projects isn't easy for me, but this one comes to mind. One because of my love for flowers, another because it reminds me to be inquisitive in art because I discovered this technique completely by accident and lastly because when I went to sell it my husband asked me not to because he likes it. 
________________________________ 


Day 2 of ‪#‎theartchain‬ and I'm sharing this fun one. While it may not look pretty to you -- this was the very first art journal page where I started exploring and playing with mixing florals and quotes -- way back in 2011. Whenever I see this I will always remember how excited and jazzed I was at how it turned out and the possibilities I saw and felt for artistic and personal growth. ‪

________________________________


Day 3 of ‪#‎theartchain‬ and I'm sharing this little love. When Nathalie Kalbach spoke these words to me during a skype chat the clouds parted and the angels sang. I have not forgotten the lesson and have been working towards being the flower and cultivating my own garden.
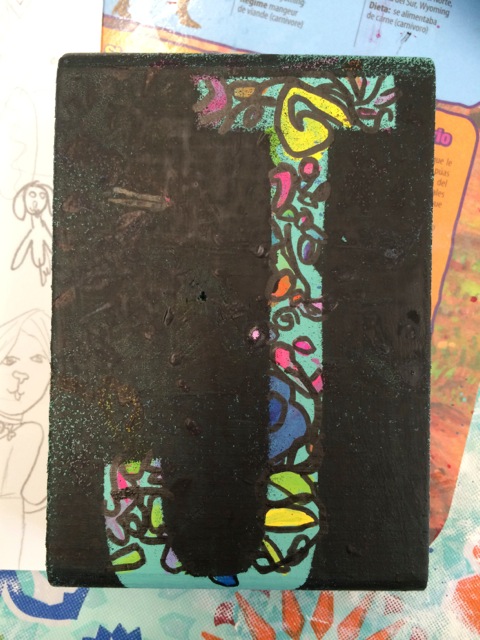
________________________________


Day 4 of the ‪#‎artchain‬ and I'm sharing this colorful gem. One of my earlier illustrations that really spoke to me -- and when I really realized what adding black to my designs really does. This image never ceases to make me happy and reminds me of that aha moment!

________________________________


Day 5 of ‪#‎artchain‬ and I'm sharing this painting. Another major break through that day. This large painting (20 x 30) went from a fussy and overpainted bowl of pears to this through frustration after several sessions of trying to get it "perfect". I realized that while it's nice to be able to paint in a photo realistic manor, I never will. It says on the bottom "bloom" because I certainly bloomed when I painted it!

Thanks for dropping by, have a great week!