Creative Jumpstart 2021

Creative Jumpstart 2021
Join me for the 10th Anniversary of CJS2021

Monday, November 19

In + Out Journal

I forgot to post that I have a new class coming up in a week or so. I cancelled my punch class and put this one in its place -- a quick and easy -- one week class.


Here's some more information:

Are you interested in Art Journaling and want to make a custom journal but not sure where to start? Or maybe you aren’t sure how to create a custom journal that suits your needs? Maybe you are new to on-line learning and not sure how that works and want a quick and easy class to get started with. Or maybe you have a busy life but want to make a custom art journal to take with you on your travels. 

In this In + Out Journal Class you will get detailed video instruction to make your own custom art journal plus a discussion of other methods you can use to create a custom journal. 

I will also do a Journal Flip Video to share many journal pages and how I created them. Also included in this course: 10 Custom + Original Journal Prompts created just for you. As a bonus THANK You for enrolling you will have access to a black and white journal page hand-drawn and designed by Catherine that you are free to print and use in your journal (this page is sized for a 9 x 12 Journal).

For more information, or to sign up: click over to My Creative Classroom: http://www.mycreativeclassroom.com/course/enrol.php?id=462 


thanks for stopping by -- hopefully I'll be out of my blog funk soon!

Thursday, November 15

Whatevers November

the WHATEVERS-2

I was looking through my Whatevers story last night and realized we are HALF WAY through with our stories. So exciting!  If you are new, you can click on the link to the right and catch up on my Whatevers so far. You might want to do that before you read my story today. 

  You can also: 
_______________________________________

Click here to see what Nat made from the photo this month!
Click here to see what Vicki made from the photo this month!
_______________________________________

Before I get started with the story today, I will say that this month I have been very short on time so I haven't narrated for you this time. Maybe when I have a minute I can get that done, but for now I hope you will be happy with the pictures and story to read on your own! 

Elldridge, Hermione and Boots were anxiously waiting for a Telegram from Forget-Me-Knot about how meeting Alexander’s parents had gone.
the count and countess.
They hadn’t been able to afford the expensive fare to cross the ocean to attend the ceremony so Knottie had gone alone. Well, she wasn’t really alone as Elizabeth was there with her family and of course Winston, Newton and Cordelia were there as well.
Elldridge couldn’t help but get a little angry. Of course they were there, she thought. They were related to that Alexander boy through Cordelia’s husband’s family. She will never stop being angry with her sister for introducing her favorite child to that handsome nephew of hers.
Just then she noticed the Telegram Delivery Boy approaching her from his buggy. She couldn’t help but think, I wonder how he knew she was on the beach.
They hadn’t been able to afford the expensive fare to cross the ocean to attend the ceremony so Knottie had gone alone.
       
Well, she wasn’t really alone as Elizabeth was there with her family and of course Winston, Newton and Cordelia were there as well.  
 
Elldridge couldn’t help but get a little angry. Of course they were there, she thought. They were related to that Alexander boy through Cordelia’s husband’s family. She will never stop being angry with her sister for introducing her favorite child to that handsome nephew of hers.
 
Just then she noticed the Telegram Delivery Boy approaching her from his buggy. She couldn’t help but think, I wonder how he knew she was on the beach. 
 
 Here's the image for this month, in case you want to play along! http://nathaliesstudio.files.wordpress.com/2012/11/06_november2012.jpg

Here is how it works if you want to play along:
  • Vicki, Nat and I have made a one-year commitment to each other and picked twelve photos with Whatevers whom we will give a story.
  • Every month – if possible always on the 15th –  each of us will do a post with an individual story that goes along for us with the same photo.
  • If you want you can play along and we will have the photo for you – just right click on it to safe it to download and show us your version of The Whatevers.
  • There are no rules to the story itself- it can be funny, sad, uplifting, breathtaking- WHATEVER
  • There are no rules on the length or the form of the story- it can be a short sentence, an essay, a poem or a soap opera – WHATEVER
  • There are no rules on the art form you choose – it can be a scrapbook layout, an altered art project, an art journal page – WHATEVER
  • Here is a rule though: if you take the photo you have to link back to us and show us your story.
  • These pictures are from our personal stash and are for personal use for you only! If you want to use them for a publication whether a book or magazine in print or digital form please ask for permission!
  • If you want to participate we’ll have a linky list for each Whatever Post.
  • You can also join our The Whatevers -Facebook Page
And one final thing, you can grab the blinkie here if you want to add it to your sidebar:
http://nathaliesstudio.files.wordpress.com/2012/06/the-whatevers-blinkie.jpg  
      

Thursday, November 1

Magic of Christmas!!!

Popping real quick on this CRAZY busy Thurday to remind you that Magic of Christmas: A Primer for Interactive Holiday Cards is starting tomorrow over at My Creative Classroom. I know it's hard to think about that ALREADY since Halloween was just yesterday -- but in this great class you'll get a LOT of creative cards made for those special people in your life!


Here are some details for you:

In this newest offering at My Creative  Classroom, she will walk you through the steps to create 10 beautiful, creative  and unique interactive cards to give to those special people in your life.  Taylor the papers, embellishments and sentiments to create the same cards for  birthday, wedding and other important celebrations you want a special card for.

Each weekday for 2 weeks you will receive  access to a new lesson. Each week the lessons will includes videos,  step-by-step instructions and downloadable .PDF files – to make an interactive  card each day. With a total of 10  Lessons – you are getting access to 5 weeks of lessons in just 2, a great value  and time saving idea!

Week 1 will be a primer – introducing you to interactive cards with instruction on beginner mechanics like easels, pop-ups, folders and tents. Each card will be a masterpiece in folding, sliding or interactivity. Moving in to Week 2 your cards will become more complicated and intricate works of art with styles like droppers, twirlers, zippers, buttons, and more intricate pop-up cards.

While this class will be a boot-camp-style in presentation, you will have plenty of time to create and share your cards during the course of the class as well as access to the Message Forums to interact with Catherine and your fellow students!

follow this link to sign up! http://www.mycreativeclassroom.com/course/view.php?id=673

Hope to see you there, have a GREAT day! Now, off to work on more classes!

Wednesday, October 31

Happy Halloween -- the ALMOST tutorial

What is it they say....the road to hell is paved with good intentions?? Well, I had every intention on finishing this Halloween card and posting it today -- with a tutorial on how I made my own Core'dinations Sandable card stock.

You can see a sneakie peakie in the photo below.
I love that Damask Embossing Folder! Since I don't have photos -- or even a completed card -- I'll just tell you how I created it, while that was not my good intention -- I wanted to give you a COMPLETE tutorial on how I made my card today -- hopefully this saves me from H E Double Matchsticks today, and on Halloween even ;-)

You'll have to choose two things -- heavy-duty cardstock and acrylic paint. For this I used Cream Cardstock from Papertrey Ink and Black paint from Claudine Hellmuth Studios. I painted the entire piece of cardstock with a pretty heavy duty coat of paint -- and then let it dry OVERNIGHT. I wanted the paint to be completely dry before I attempted to sand it!

When it was dry I ran it through my Vagabond in the Damask Embossing Folder. 
When the embossing was done, I sanded it with a sanding block to reveal the cream cardstock underneath. Easy Peasy Lemon Squeezy. Doesn't it look great?? It's perfect for when you can't get to the store to get some Coredinations -- or you can't find the colors you need for your project.
Here's the other part of that card that I got started but never finished, I love this stamp. Speaking of that road -- I bought this stamp in August thinking I would do this tutorial for you --- ha ha.

Well, I do hope you have a HAPPY and SAFE Halloween. Don't eat tooooo much candy -- I'll try not to as well! Thanks for stopping by!

Tuesday, October 30

Ready for my Trick or Treaters!

I like to do a little something special for the trick or treaters that come to my door every year. Not only because I love Halloween -- but it's easy when you only get 5 of them every year!


Since I'm always trying to AVOID eating candy, this year I bought 5 boxes of candy from Wal-Mart. If it's not opened I'm not going to eat it, lol. I also picked up some HUGE glittered spiders to decorate each box somehow.
I decided the easiest and fastest way to add the spider to the box was to tie it with a piece of ribbon  
Then I made a little tag. Easy Peasy -- 10 minutes to make all 5.
First I stamped the spider web in the background with VersaMark Ink and quickly wiped some brown PanPastel over the wet ink. A quick Boooo! stamped on the spider web with StazOn ink and the hard part was done.
I punched them out with the Real Estate punch from EK Success and then inked the edges lightly with orange. To tie them to the spider I punched a small hole and added one to each spider with twine. NOTE: I have one little girl that may be afraid of spiders so I didn't put one on her box just to be on the safe side!

That's it. Literally this project took me 17 minutes from start to finish -- and not that my nieces and nephews and little cousins will notice -- but I think their parents will. It's just not Halloween if I haven't done a crafty treat project anyway so who cares if they notice! 

with that I'm off to get some things done. Have a great day -- and for those of you on the East Coast -- stay safe and I hope that the clean-up from the hurricane isn't to bad for you! Thanks for stopping by!

Monday, October 29

I was….

I was as a gem concealed; ME my burning ray revealed. 


Sharing some images from the art journaling demo's I did over the weekend at Absolutely Everything. Need to erase the pencil lines, but other than that -- DONE and happy! 

 Today I am working on getting things done in case our power goes out because of Hurricane Sandy but wanted to take a moment to share these two pages. I love them and the work that my students created was beautiful as well -- but I got so caught up in the moment that I forgot to take pictures!

The quote I found on the inside of the spine on a VERY OLD book that had fallen apart. It felt fitting for the day! This is my technique "the art of subtraction".


And this is "keeping it private"

The classes were small, but everyone had a GREAT time. 
Looking forward to teaching in North Attleboro this weekend!
Hopefully the weather has changed for the better!

Well that's all for today. For those of you feeling the winds and rains from Sandy - be safe and leave me a comment about what it's doing for you if you can.
Have a great day and thanks for stopping by!

See you next time!

Wednesday, October 24

You can FIND me here!

Not everyone likes on-line learning so I'm branching out and starting to teach at some wonderful shops in New England this fall. The first class I'm teaching is this beautiful Art Journal and some beginner Journalling Techniques.
You can find this class at these Massachusetts locations: 
  • Absolutely Everything: Saturday, October 27th: FMI and to check out their blog and on-line store: http://www.absolutelyeverything.com/  or call 978-887-6397 to enroll -- while space is available!
I've also developed a Mini Magic of Christmas Interactive Card Class that I'll be teaching at Absolutely Everything on November 11th. This class is a 3 hour class and will cover 3 Interactive Cards from my Magic of Christmas Interactive Card Class at My Creative Classroom. 

For those of you that do like on-line learning I've got these classes coming up at My Creative Classroom in the next few weeks:
  • Artful Cards: This class starts on October 26th and will last for 4 weeks, for more information, click on over to the class syllabus and supply list here: http://www.mycreativeclassroom.com/course/info.php?id=583 
  • All About Christmas: This is a collaborative class that several talented teachers from MCC gathered together to teach. This class started on October 23rd and is still open for enrollment. Find out more here:  http://www.mycreativeclassroom.com/course/view.php?id=653
  •  Magic of Christmas: Starts November 2nd -- and don't forget for every class you enroll in for November you get access to a free THANK You class we are offering called "It's Ornamental". The Magic of Christmas consists of 10 lessons where I teach you how to create some really COOL Interactive Cards!  Find out more about Magic of Christmas here: http://www.mycreativeclassroom.com/course/view.php?id=673
Well that's all for today....if you have any questions about any of these classes please leave a comment with your question and email address and I will reply ASAP! Have a great day! 

Tuesday, October 23

I hope that is ok with you...

You know that moment, when you realize you may have over-committed yourself and have a to-do list that is miles long -- and everything on it you are passionate about. The thought of giving just one of them up is not an option...yeah. That moment.
That is the moment -- the month -- the next few days -- maybe the end of the year that will be my life. And I am happy to have all these wonderful, beautiful things on my to-do list. Early mornings and late nights are in my future.
Yes, many late nights and long days in the weeks ahead. And that is ok with me. But for you and for today I just have pretty pictures to share, I hope that is ok with you!

That is all....have a great day and thank you for stopping by today!
PS. I love this photo - it's so mysterious with the fog in the background!

Friday, October 19

How you can get a FREE Class at My Creative Classroom!

Every year I make a different style of ornament for family and friends -- last year it was Felt Ornaments die-cut with a Spellbinders Die, the year before that Glittered Snowflakes...you get the picture -- something fun and creative that I can give away to the people I care about.

Once a year the MCC Faculty come together for a very special class that we can give away to our  wonderful students -- it's our way of saying thank-you for your continued support.

What better way to thank our students each year than offering them the opportunity to take a free class from many of the talented instructors here! Last year at MCC in our THANK You class I shared how I created this ornament, I also had kits available to purchase! I am so excited to combine this activity and make ornaments for family and friend -- and show my students how they can too!
Last year the course was very popular and enjoyed by all! 
 
This year, I will show you how I made the ornament below, my Limited Edition 2012 Holiday Ornament! But, there is only way one to get in on all the fun! Register for any class that starts in November and you will automatically be enrolled in It's Ornamental at no additional charge. (yes -- NO charge -- and 8 Instructors will be offering FREE Lessons on Holiday Ornaments, that is amazing!)

PS. I will also have about 75 kits to purchase if you get in the class -- last year I ran out we had so many students enrolled! 

But better than that, I recently took some items to a beautiful consignment store in New Hampshire -- and I must say -- everything I brought is selling like HOT CAKES....and she asked me to make 15 of these beauties. So, if you live near Exeter, NH and frequent Reminisce you can pick up a Limited Edition Ornament of your very own!
Yes, production is in full swing! Glittering is up next!


Well, that is all for today. Have a GREAT weekend and thank you so much for stopping by!

Thursday, October 18

CRAFT Challenge: Use Metal

Sharing a card I made for a challenge that My Creative Classroom is sponsoring today over on the Craft Challenge blog! If you play along you have a 1 in 3 chance to win a seat in ANY class at MCC -- and hopefully you'll pick mine ;-)

Anyway, the theme of the challenge was to use metal -- in any way -- on a card.


I also did some creative punching! 
 

But the main event was the metal tag. I purchased some Metal ATC Blanks over at JoAnn's and then used my Spellbinders Mega Oval set to punch out the tiniest oval in the set. Sweet. I also used my 1/4" metal letter stamps (Harbor Freight) to stamp hello into the tiny tag. Just make sure you orient your letters in the right direction so you don't have to do that job 2 times like I did. 
p.s. It's also a good idea to sand the edges of your cut tag before you use it so smooth them out and prevent any cuts.
p.s.s. While I am brave and don't mind trying hazardous techniques with my tools and supplies, just know that this technique may not be good for your dies and to proceed with caution and at your own risk. 
I also have a Tim Holtz Screw Punch which I used to punch the hole in the tag to attach it to the ribbon. 

The rest of the card was pretty easy too --
  1. First, I embossed the background paper (Ruby Rocket) with a Damask Embossing folder and sanded it slightly. 
  2. Then stamped the background image (Outlines Rubber Stamp Co.) 2 times on cream cardstock (Paper Trey Ink) . For the first stamped background I painted the imaged blue and the flower light red and trimmed it to the edge of the image. 
  3. On the second stamped background I painted the flower red and then cut it out with my detail scissors. 
  4. For the center of the flower I layered a bunch of different punched elements to create the pretty delicate center and then layered the elements on the first background stamp with 3D Dots (EK Success).
  5. Before I attached the stamped element to the card I wrapped a piece of ribbon around it and created a double bow and attached the metal tag with a piece of twine (Papertrey). 
  6. Then, I attached that to the card panel and attached piece of newsprint I had used to clean up my stamp after using it with my Gelli Plate to the bottom. 
  7. To finish up I stitched around the edges here and there and added an adhesive pearl (K & Company) to the center of the flower -- and voila -- hello card complete!
THANKS for stopping by -- take a look at some of the classes I have coming up at My Creative Classroom this fall -- hope to see you there! 

Monday, October 15

October Whatevers


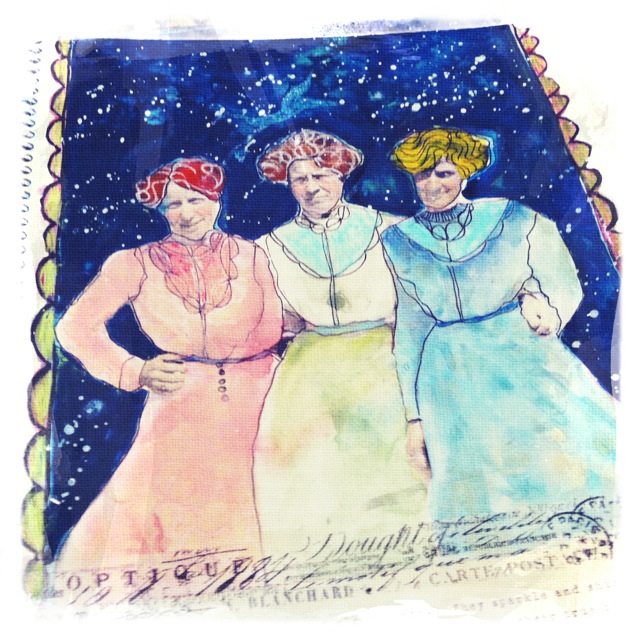
It's that time of the month again -- the time when you get to find out what Winston and Newton Whatever are up to! So, without further delay - here are my pages....and if you scroll down a bit you'll see my slideshow and I will tell you the story this month!
Winston couldn’t believe her eyes – a post card from Father – all the way from Bombay, India. How it found her in Germany she would never know – all she could think of was how happy she was to have word from her father! 

The postcard of the city was so colorful that poor Winnie wanted to leave the drab German castle and travel to be with her sweet father. Helping in the clinic HAD to be better than this.


The last few weeks had been such a circus – brokenhearted Knotty wept constantly, Newton tagged around with the Count (why couldn’t they just call him Grandfather??) begging for pencils and drawing paper and her Mother – OH, poor Mother. She was always hovering around the kitchen hoping to sneak in when the Countess (Grandmother??) was not around. The kitchen was her only place to be calm and think but Grandmother wouldn’t hear of such a thing.
Poor Winnie longed for home and time with her father. Today on the train she saw a man that looked so much like him that she ran into his arms. It wasn’t until he spoke to her in German that she realized, with a heavy heart; it wasn’t him. She was beginning to think her father was just a dream – that she really didn’t have one – and then the postcard came.

She flipped it over to read her father’s message. 

But when was all she could think, WHEN Father? Winnie tore the postcard to pieces just like the last 10 postcards she’d received from him – all written exactly the same. 


The Whatevers: October, 2012 from Catherine Scanlon on Vimeo.

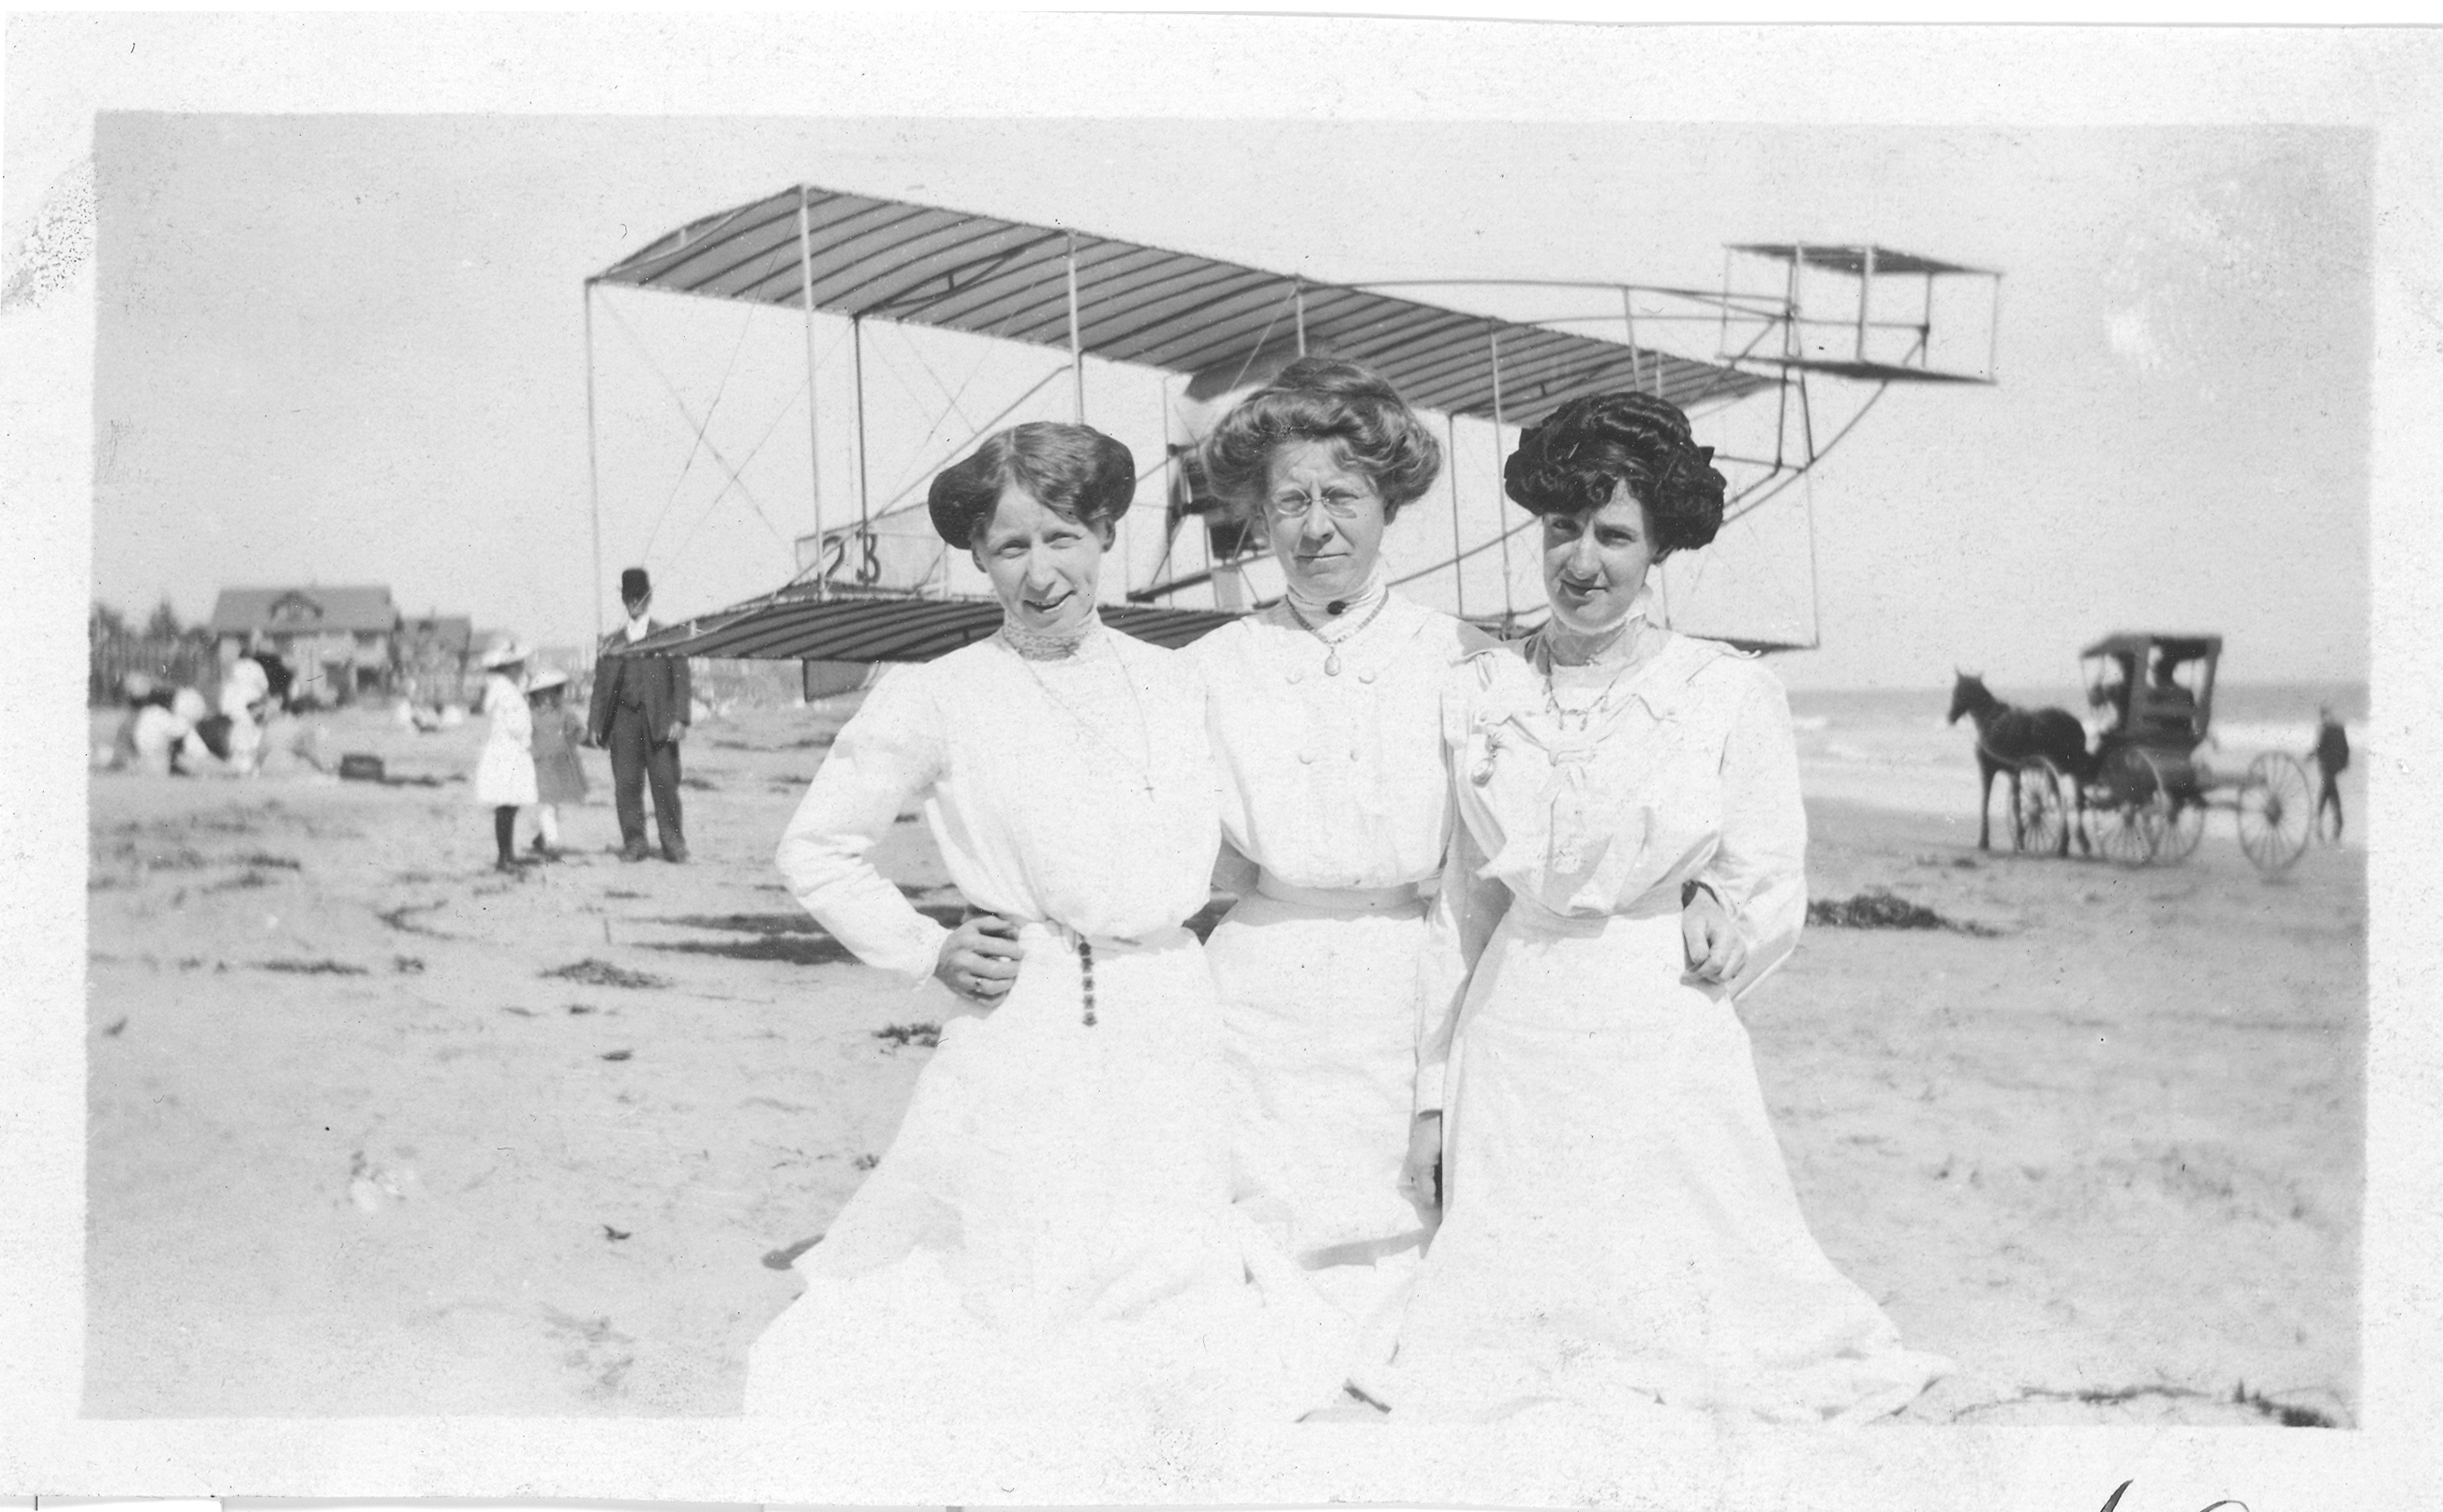
 Here's the photo, so you can play along too -- if you want -- and we'd love to have you!


  • Nat, Vicki, and I have made a one-year commitment to each other and picked twelve photos with Whatevers whom we will give a story.
  • Every month – if possible always on the 15th –  each of us will do a post with an individual story that goes along for us with the same photo.
  • If you want you can play along and we will have the photo for you – just right click on it to safe it to download and show us your version of The Whatevers.
  • There are no rules to the story itself- it can be funny, sad, uplifting, breathtaking- WHATEVER
  • There are no rules on the length or the form of the story- it can be a short sentence, an essay, a poem or a soap opera – WHATEVER
  • There are no rules on the artform you choose – it can be a scrapbook layout, an altered art project, an artjournal page – WHATEVER
  • Here is a rule though: if you take the photo you have to link back to us and show us your story.
  • These pictures are from our personal stash and are for personal use for you only! If you want to use them for a publication whether a book or magazine in print or digital form please ask for permission!
  • If you want to participate we’ll have a linky list for each Whatever Post.
  • You can also join our The Whatevers -Facebook Page
  • Click here for the Linky: 

And, one more thing -- here's a little image if you want to share it on your sidebar! 
Hope you'll play along -- thanks for stopping by -- have a great Whatever!

Sunday, October 14

Happy Ghosts #3

I'm the Guest today over on the Sizzix Blog and thought I would share my post -- head on over to their blog and check out the AMAZING projects they have over there!
________________________________

For this card I'm going to show you how to create a spooky dimensional 6x6 card using the Ghosts #3 Bigz Die, but before I get to the spooky stuff, let me share something I discovered I could do. I knew I wanted to make a 6x6 card -- but I didn't have an Embossing Folder that would emboss the entire piece of Core'dinations card stock. After looking around my studio for several hours minutes my eye caught on a new stack of stencils I received from a sweet friend.....and an idea percolated -- I wonder if I can emboss my cardstock using that stencil -- its just the right size for my paper and the texture is a little spooky too. So I built a sandwich using my Platform, an embossing mat, chipboard, my paper and my stencil -- and it came out beautiful -- and the sanding gave it the spookiest look I was going for.

After I embossed the card stock I used a circle cutter to cut the circle in the center. The distressing tool chewed up all the all the edges (circle in the center included) and it was perfect for the beginning of my card.

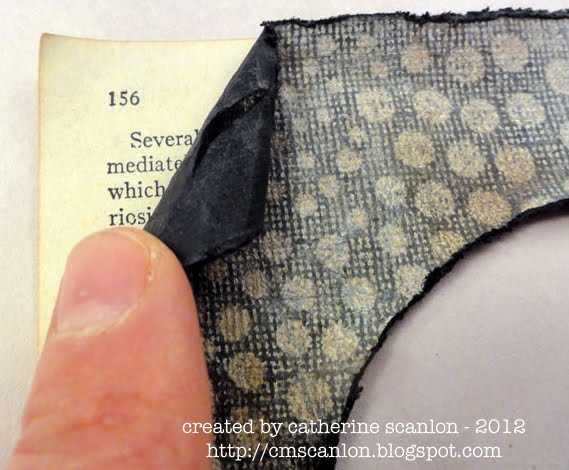
To get a little more depth and destruction I curled one corner of the card stock with my finger rolled it in to distress the paper a little more, to enhance the spookiness I added a piece of paper from an Edgar Allen Poe book underneath.

I'm really in love with Core'dinations card stock -- and wanted to add a black background behind my circle but the black alone was to boring. So I made a custom embossing shape using the Ghosts #3 Bigz and two thin layers of chipboard (from a cereal box), glued them together and Embossed them on the black card stock. I used a small piece of sandpaper wrapped around a block of wood to give my card stock a light sanding to reveale my Ghost.


When I was done with the sanding the Spooky Ghost had just the right amount of darkness inside the circle I was looking for.


The next step was to cut another circle in my card base and adhere the Ghost on the inside. I also used the packaging that the Bigz Die came in to cut two clear Ghosts.

I have been wanting to use some Glow in the Dark Glitter on a project for some time, and this was just the right one! A little hint, when covering something completely with glitter I like to after I have applied the glue to the entire piece, I hold it with a clothespin and sprinkle the glitter -- this keeps my fingers glue and glitter free.


After I sprinkle the entire Ghost with Glitter I hold the edges of the already glittered piece and cover any remaining uncovered spots with glitter in my tray. It works perfectly and I don't have to run to the sink every time to clean the glue and glitter from my fingers.


When the Glow in the Dark Ghosts were dry I was ready to do the final assemble for the card. To get a little depth between the Ghost in the background and the Glow in the Dark ones I used Foam Tape to raise them up off the orange card base.


It looks a little messy here, but the foam tape would be hidden with the Stencil Embossed Coredinations Cardstock.


Looks good. The top layer also has foam tape around the edges to help it pop off the card base.


The final touch was a ribbon around the entire card and a tag made with a punch and a white colored pencil. To make the black tag pop off the card I used the edge of the colored pencil to make the edges of the tag white. It looks great.


I'm really pleased with my Spooky Ghosts #3 Card and hope you will be inspired to make something spooky this week as well, after all Halloween is just around the corner.


Thank you Tammy for asking me to be a Guest Designer for the Sizzix Blog this month, I'm really honored and enjoyed playing with the Ghosts this month!

Happy Halloween everyone!